
Device Requests
Overview
Section titled “Overview”A device request is how you get a device for an engagement. You say what you need and when you need it, and a configured device shows up ready to test. You can ask for physical hardware shipped to a site, or a virtual appliance you download and run yourself. Get the request right and it arrives ready to work; get the dates or contact details wrong and you can lose days to shipping problems. This page walks through both paths and the decisions that actually matter along the way.
You can request three things:
- Physical hardware devices are custom Linux computers with cellular failover and built-in VPN connectivity. You use these when you need a box on the client’s network.
- Virtual appliances are downloadable VM images (OVA, QCOW2, and other formats) for whatever hypervisor the client runs. Reach for these when shipping hardware is not an option.
- Wireless testing equipment means optional ALFA wireless cards bundled with a physical device for wireless work.
Every request is subject to U.S. export control regulations and VTEM Labs’ export policies. Some countries require extra review or cannot receive ARROW products at all, and choosing a virtual appliance does not change that, because releasing an image is an export in the same way a shipment is. The Export and Deployment Policy sets out the rules and Annex A of it lists every destination. The ARROW Platform also flags the destination for you in two places, on the client location as soon as you enter a non-US country, and again on the request itself when you pick a delivery location outside the US. The US territories are not foreign destinations, so Puerto Rico, the US Virgin Islands, Guam, American Samoa, and the Northern Mariana Islands are treated as domestic and are not flagged. Contact support before you commit to a delivery location you are unsure about, since requests to restricted countries can incur legal review fees and add significant time to processing.
Before You Request: Add Your Client
Section titled “Before You Request: Add Your Client”You cannot create a request until the client exists in the ARROW Platform, so set this up first. The Clients section holds every client in your organization along with their locations, assigned devices, and primary contacts. Only Admins and Managers can manage clients.
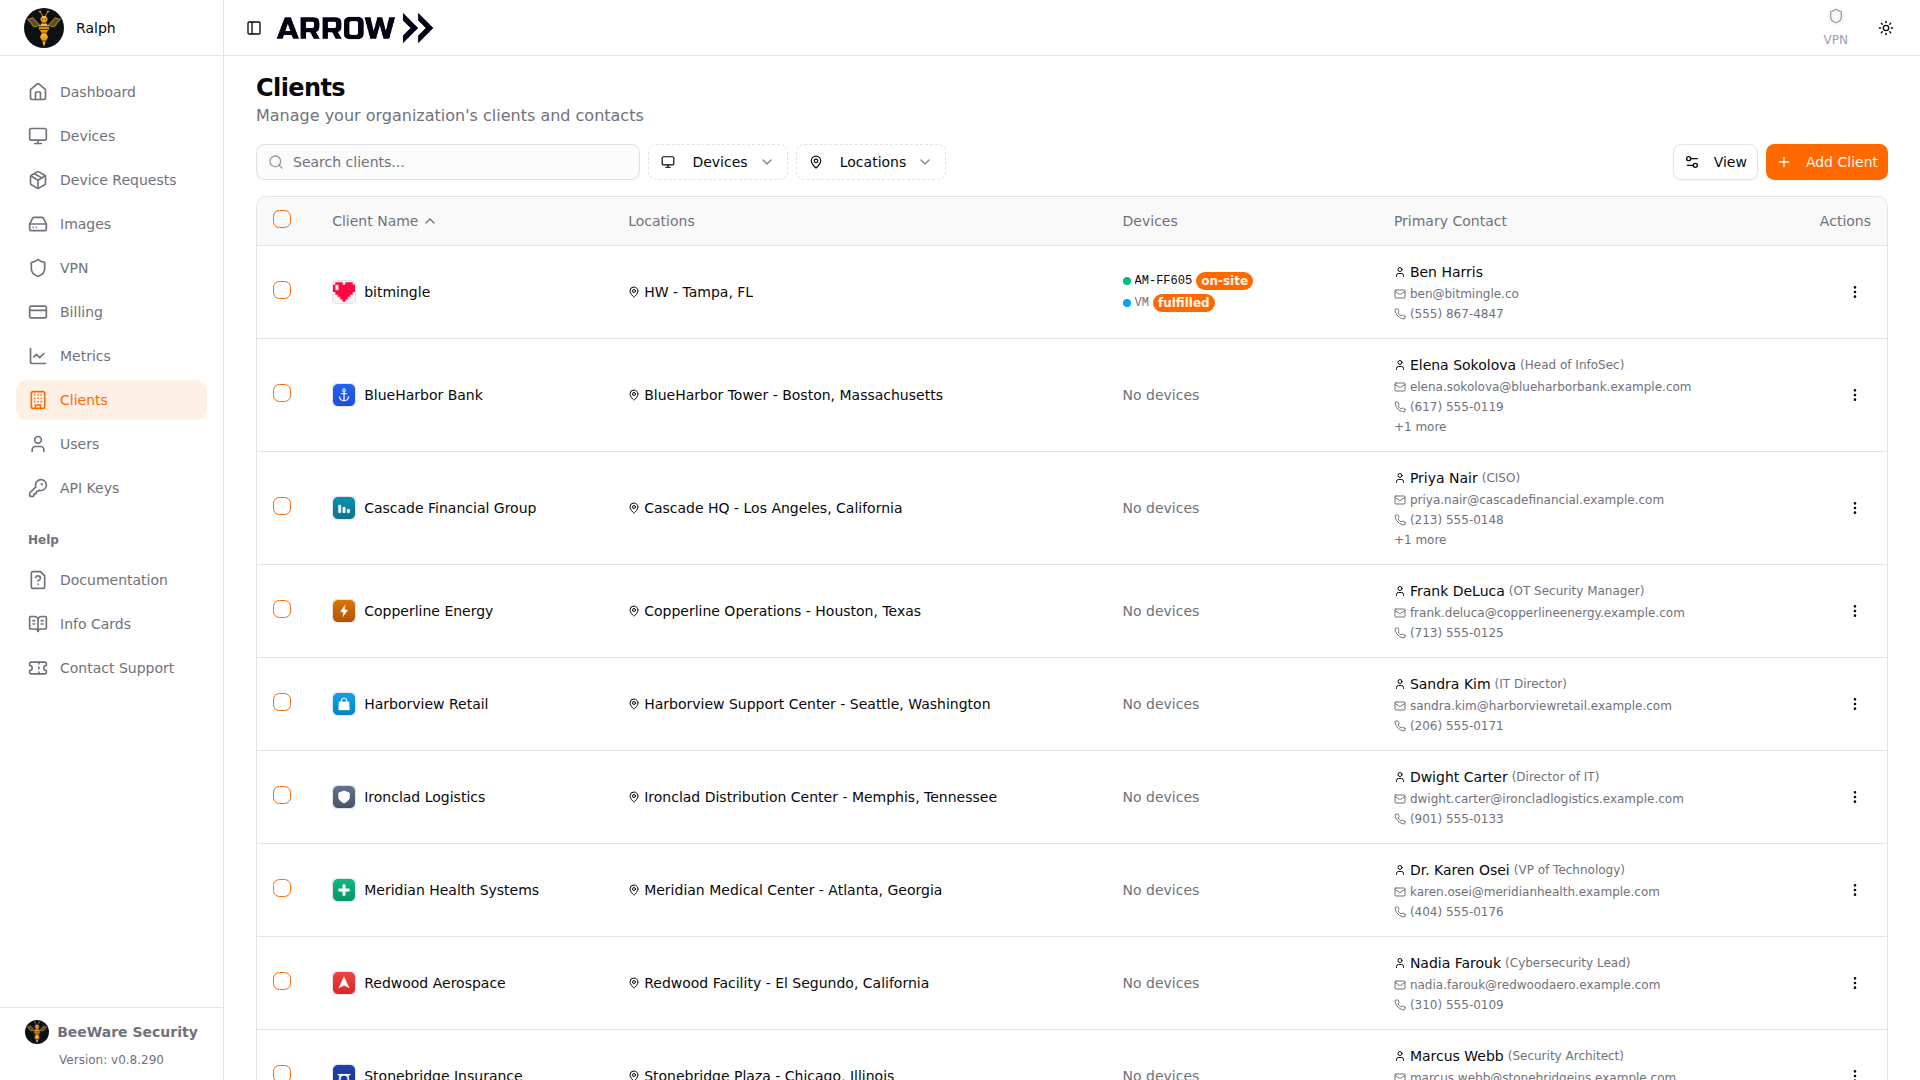
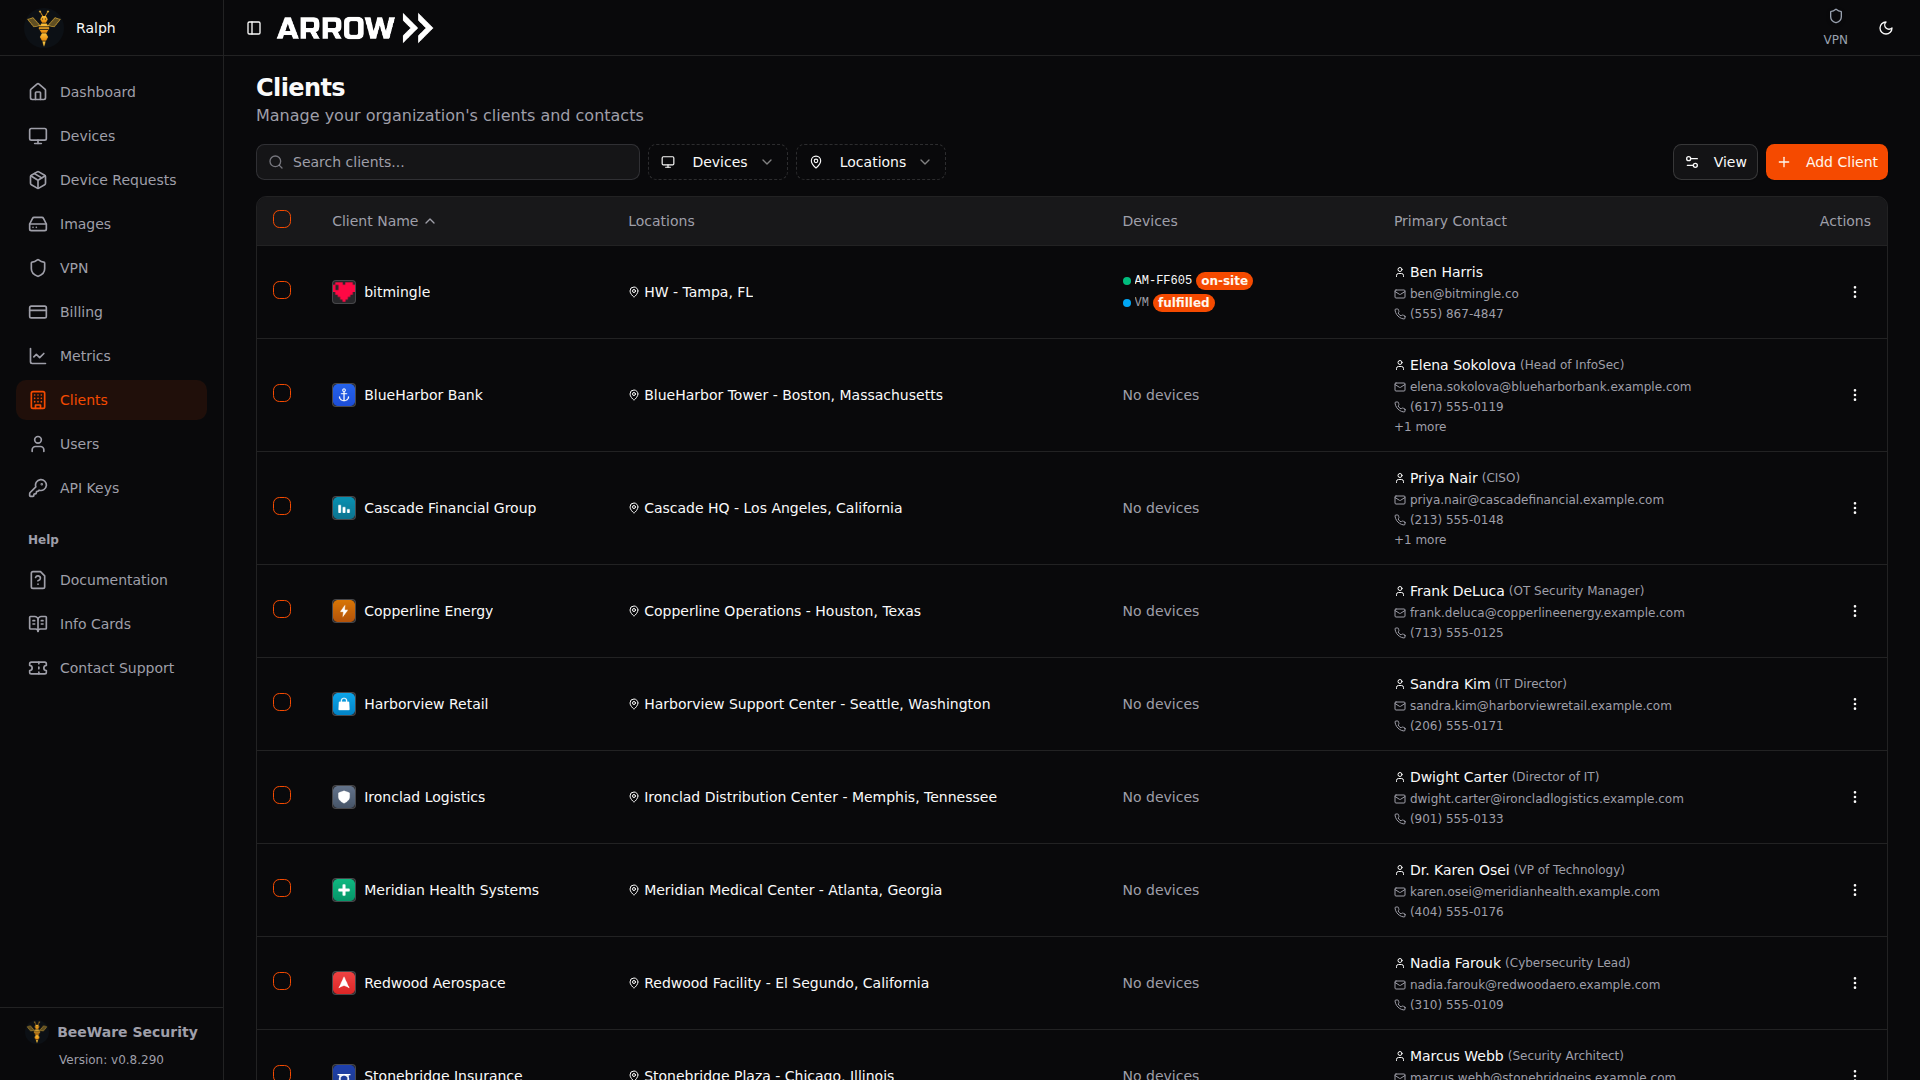
The Clients page listing each client with its locations, devices, and primary contact
The Clients page listing each client with its locations, devices, and primary contact
The page works like Devices, with a collapsible filter rail on the left that holds the search box and lets you narrow the list by Devices or Locations, and View above the table chooses which columns show.
To add one, open Clients in the sidebar and click Add Client. In the dialog, give the client a Company Name (required) and an optional Website, then add at least one Location and one Point of Contact. Click Create Client when you are done.
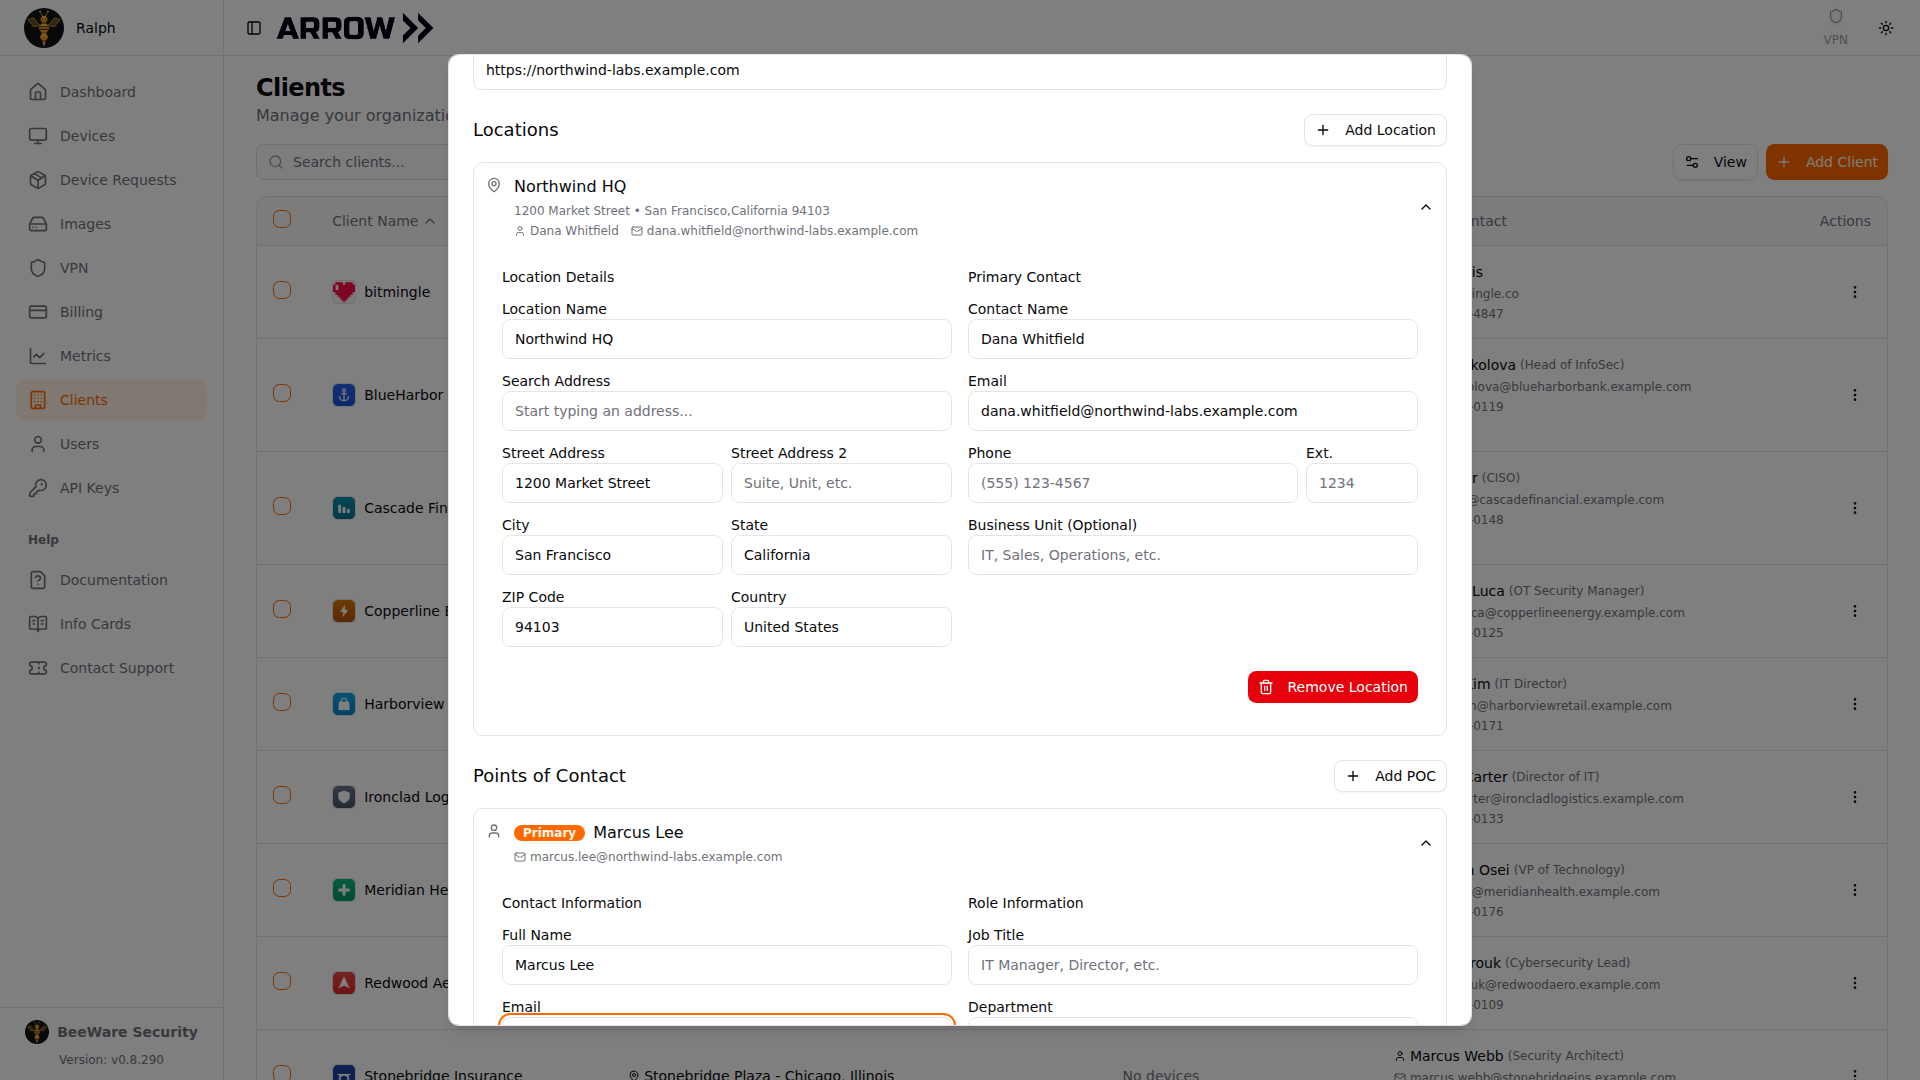
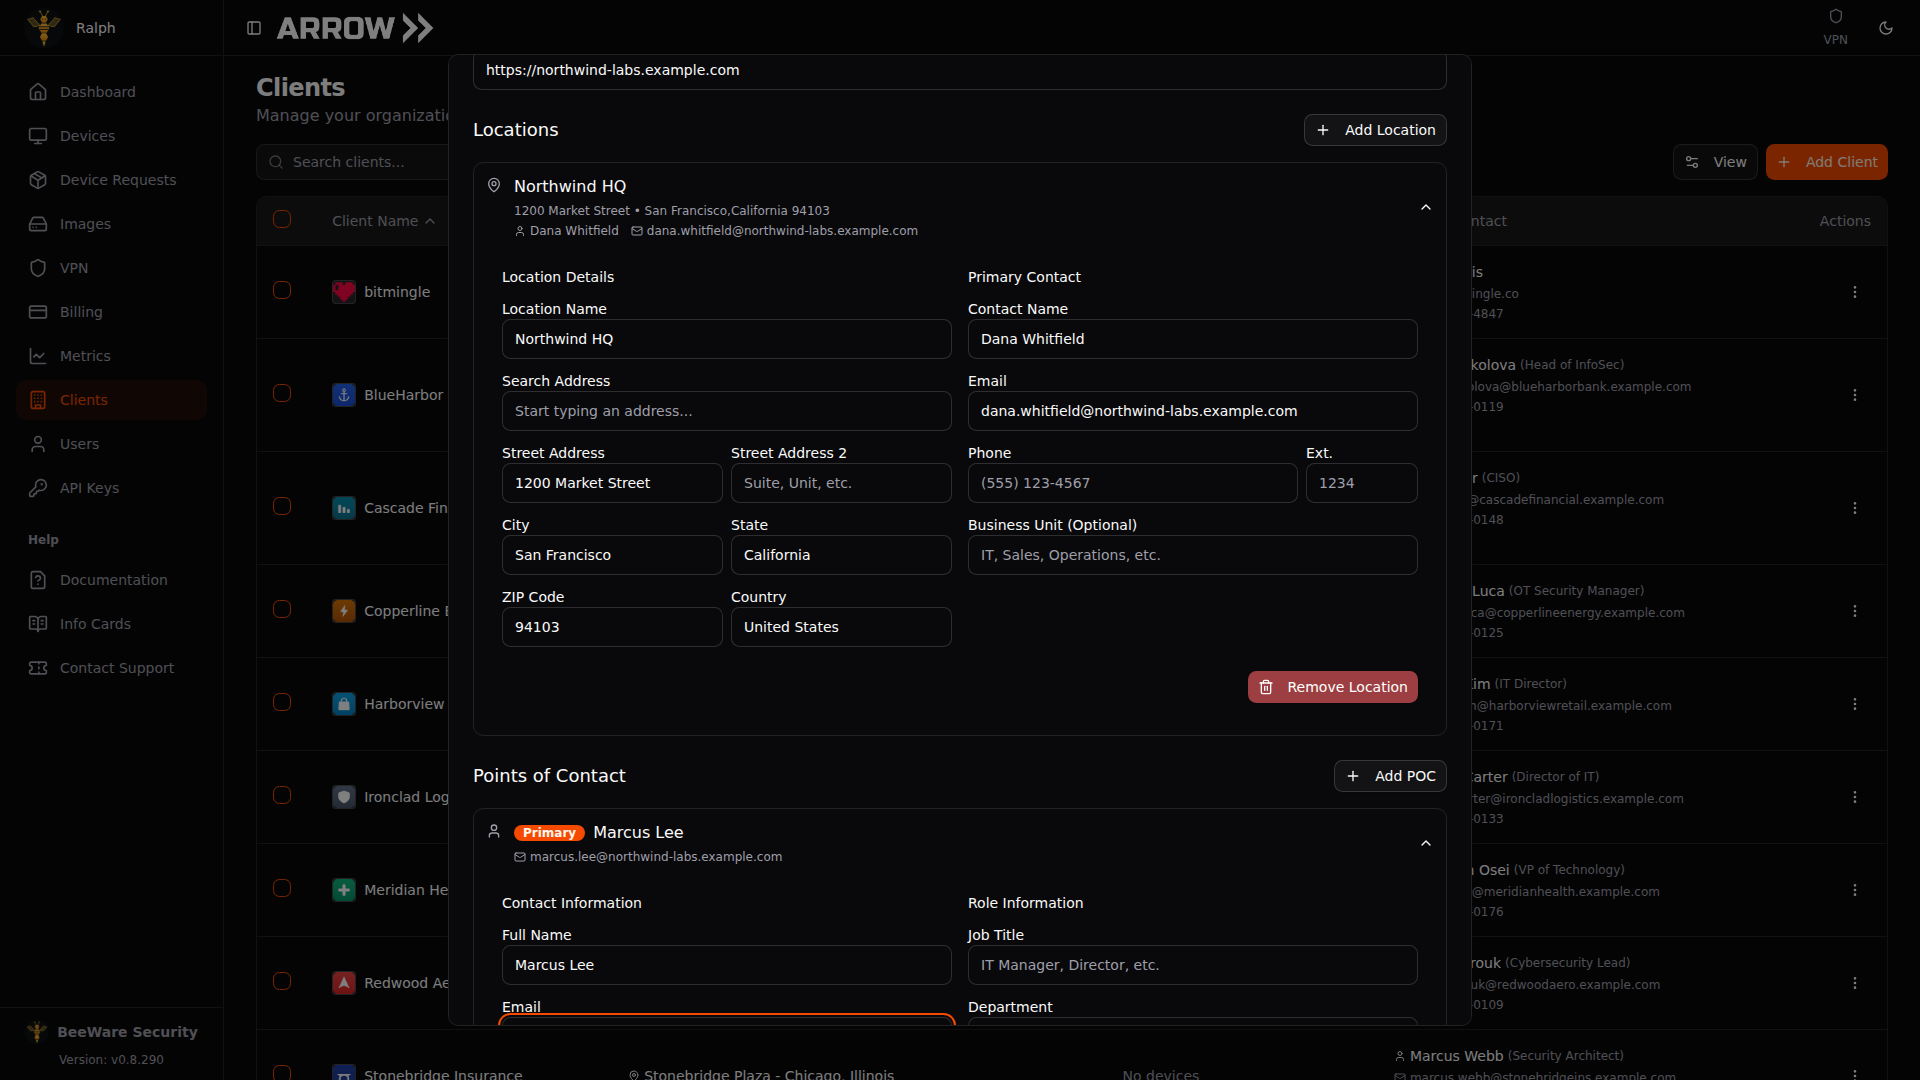
The Add New Client dialog with Basic Information, Locations, and Points of Contact sections
The Add New Client dialog with Basic Information, Locations, and Points of Contact sections
Locations
Section titled “Locations”A client can have several delivery locations, which matters when devices go to different offices or project sites. Add them from the Locations section of the Add New Client or Edit Client dialog. Click Add Location and enter a recognizable name (for example, “NYC Headquarters” or “Chicago Branch”), the full shipping address, and contact details for that site. The location you pick later on the request is where the hardware ships, so name them clearly.
Points of Contact
Section titled “Points of Contact”The Point of Contact is the person the carrier calls when a delivery needs a signature or hits a snag, so this is not a field to rush.
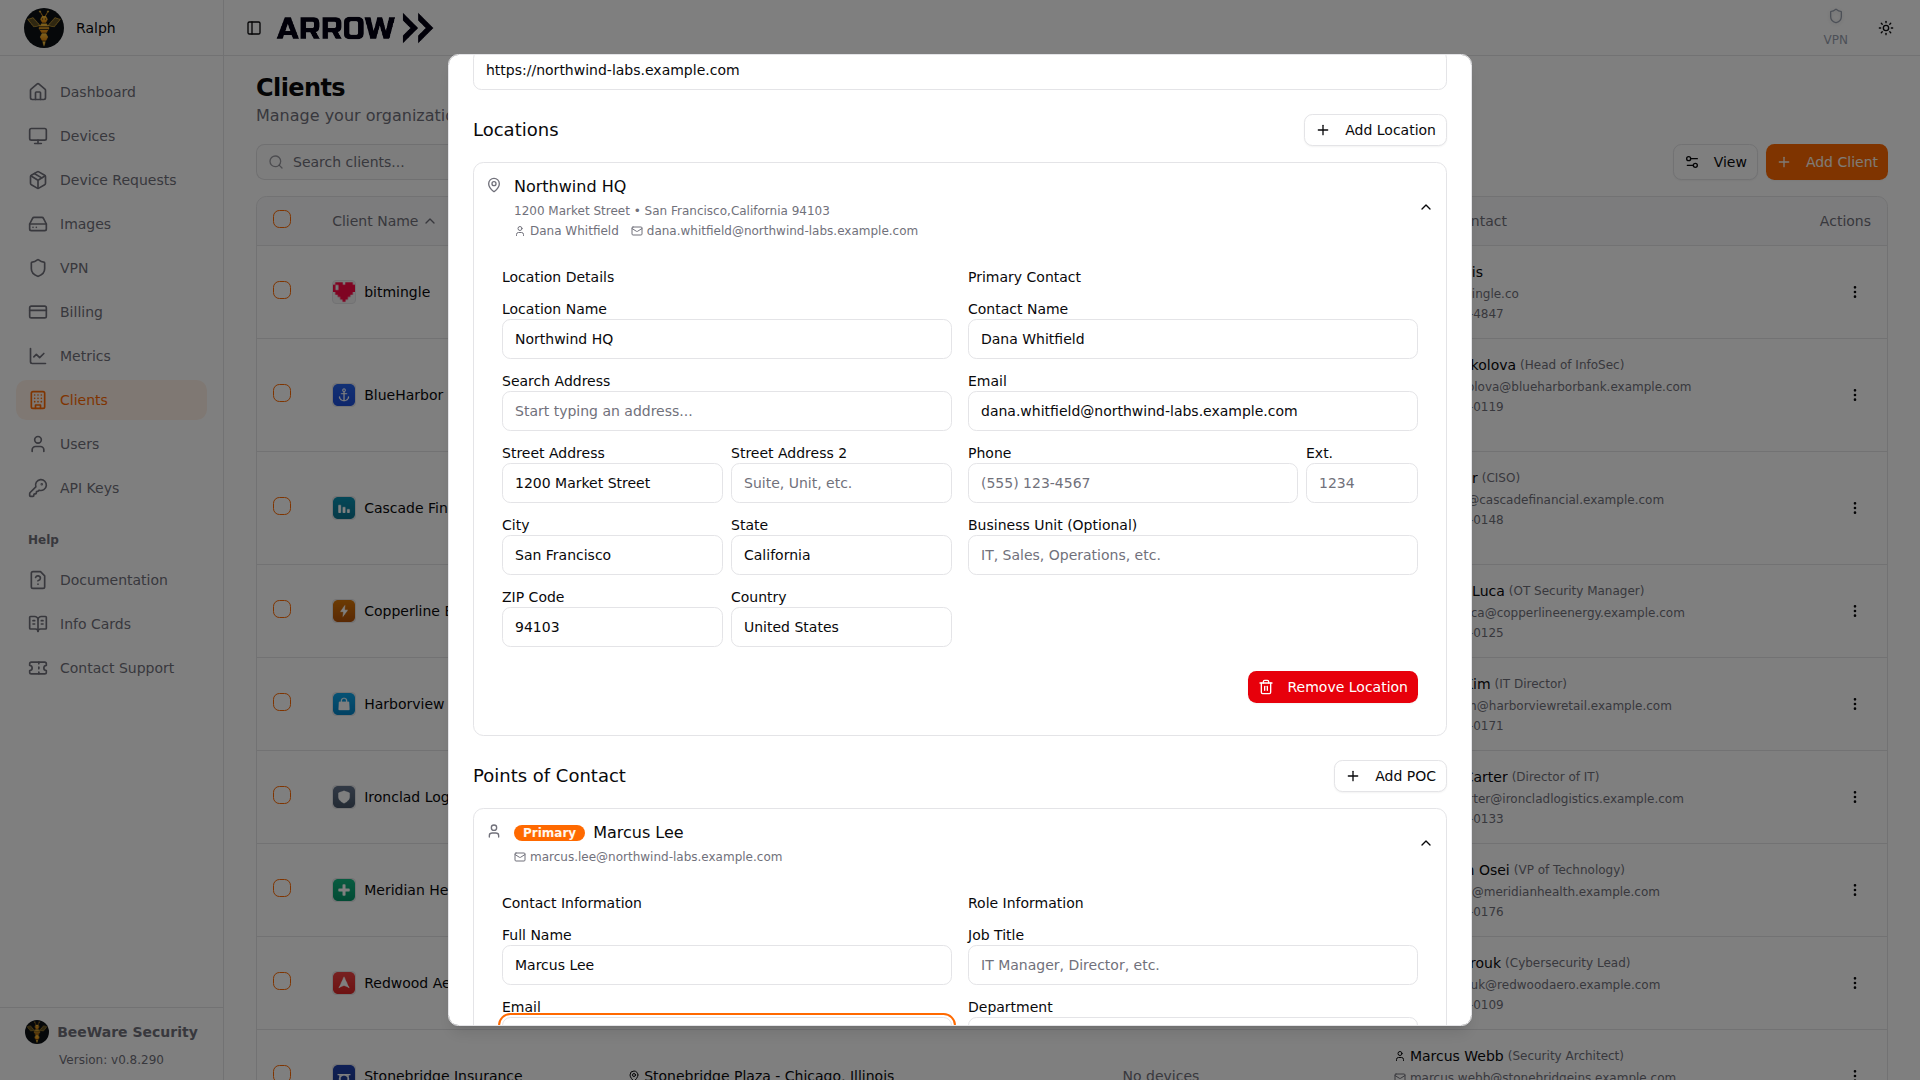
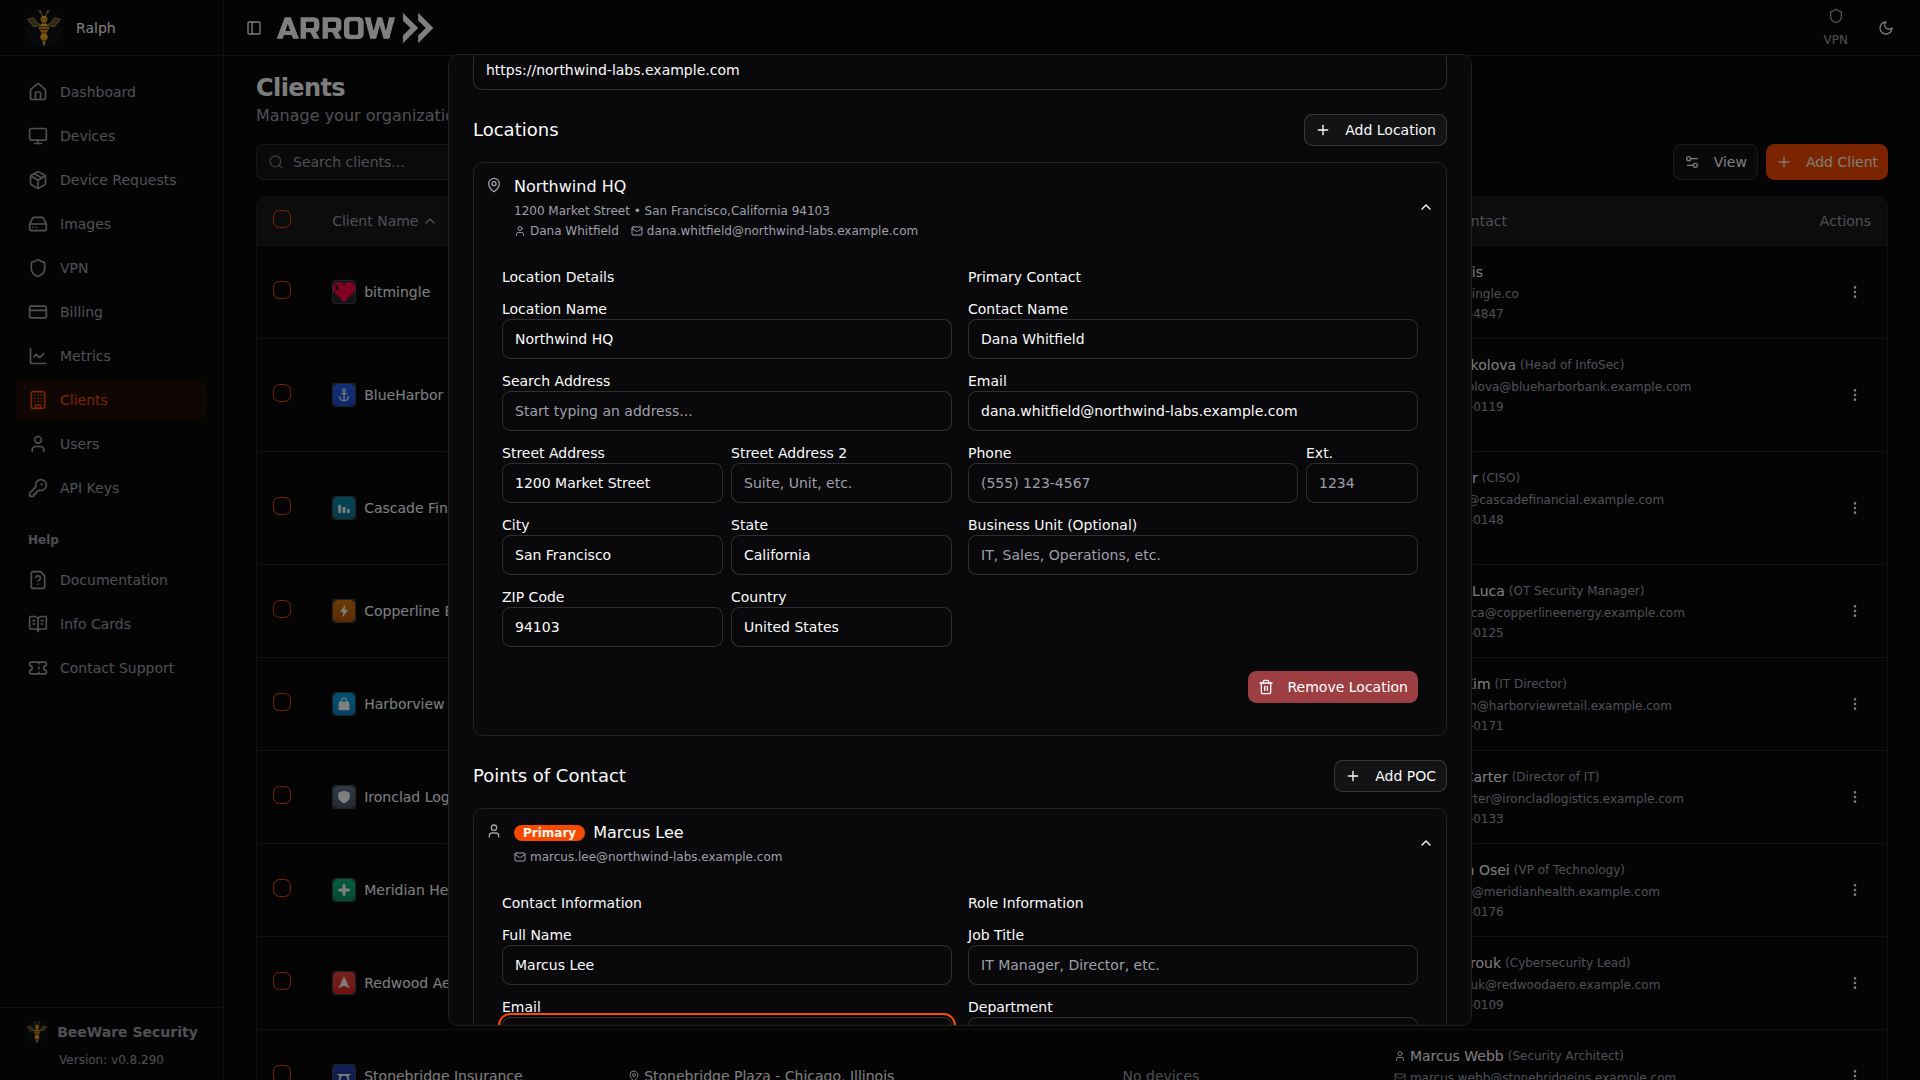
Adding a Point of Contact to a client
Adding a Point of Contact to a client
Creating a Device Request
Section titled “Creating a Device Request”Open Device Requests in the sidebar. You will see your existing requests in a table with a New Request button in the top right, next to View for choosing which columns show and Refresh. When the table is wider than the space it has, it drops its least important columns instead of making you scroll sideways, and brings them back once there is room again, for example when you collapse the filter rail. The device, its status, and Actions are never dropped, and a column dropped this way stays ticked under View, marked Hidden to fit. Filtering lives in the rail down the left side, with a search box, then Status, Type, Clients, Opportunities, and Consultants sections, each listing how many requests match. Completed requests are hidden by default, so tick Show complete at the bottom of the rail if you are looking for an old one, and use Clear all filters to get back to the full list. The button beside the search box collapses the rail when you want the table at full width. Your search, filters, and sort order are kept in the page’s address, so a refresh or the Back button brings back the same list, and you can copy the link to share it.
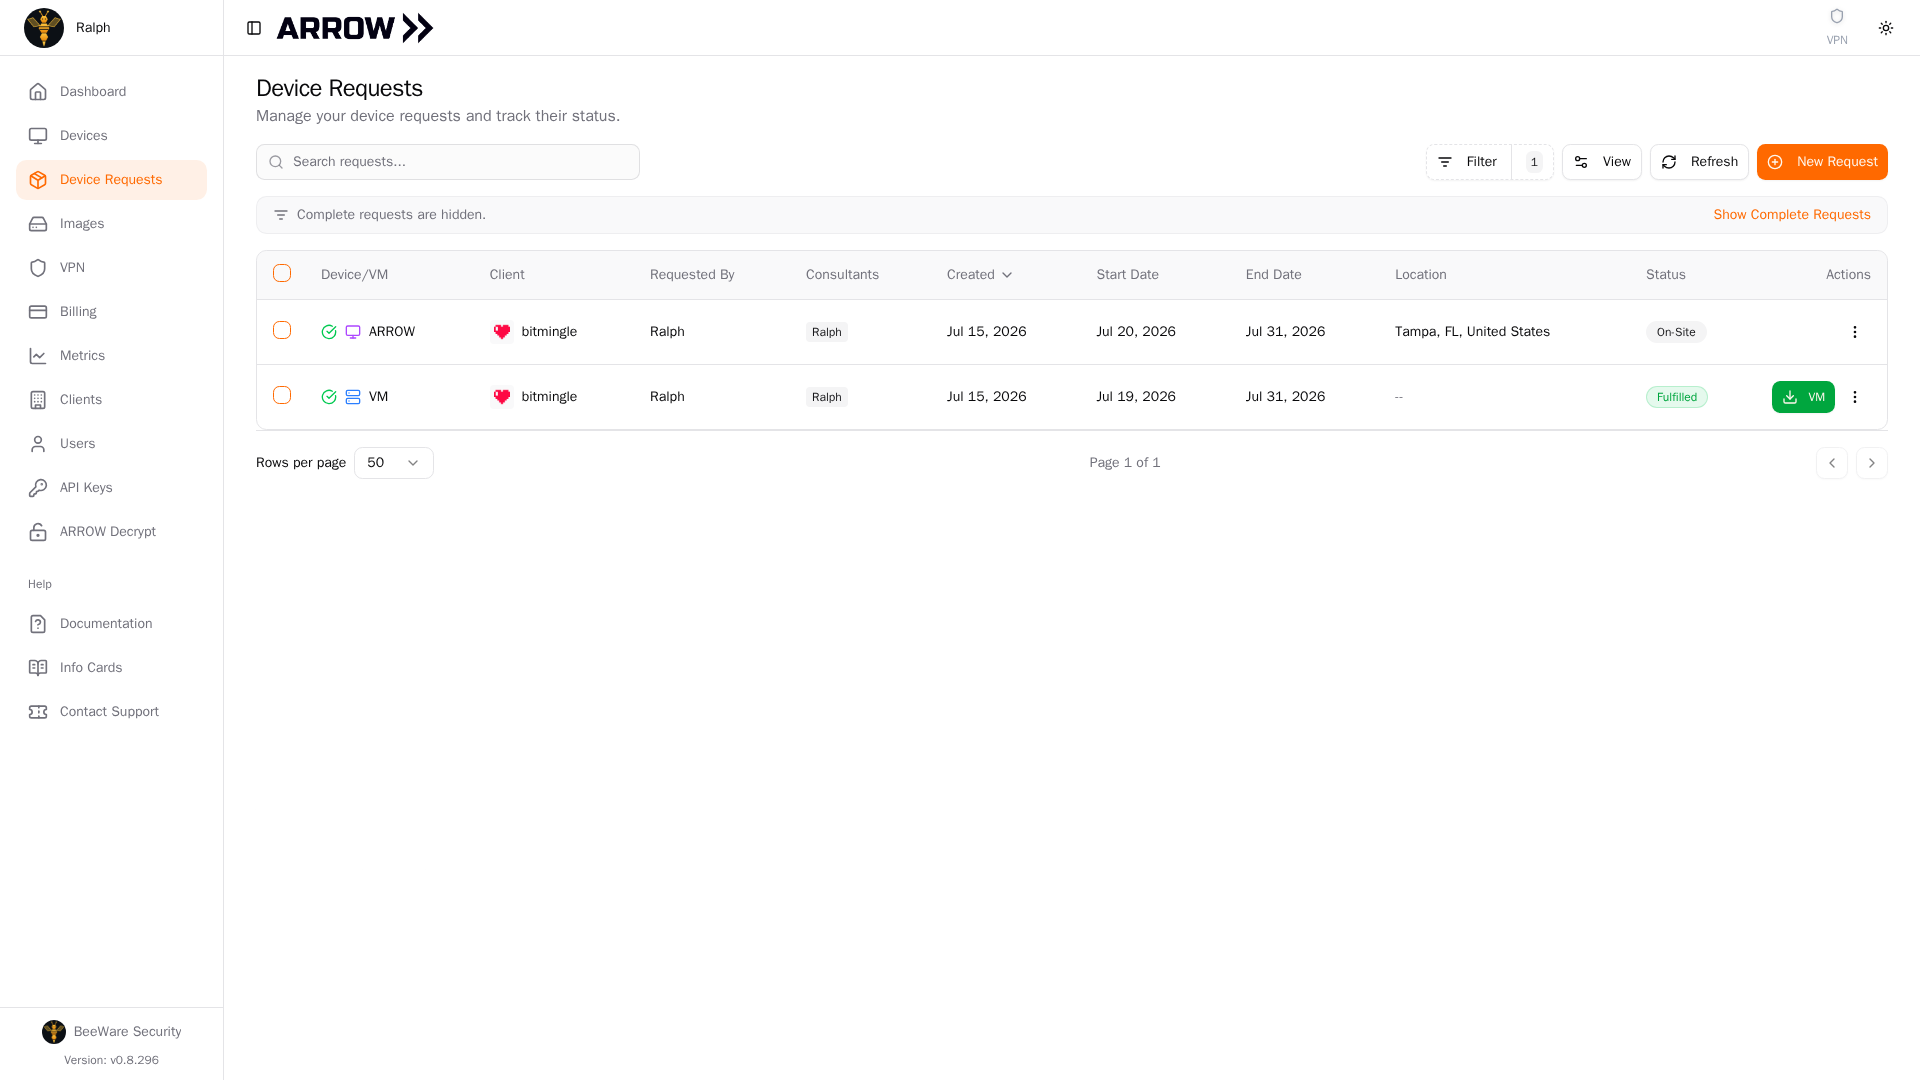
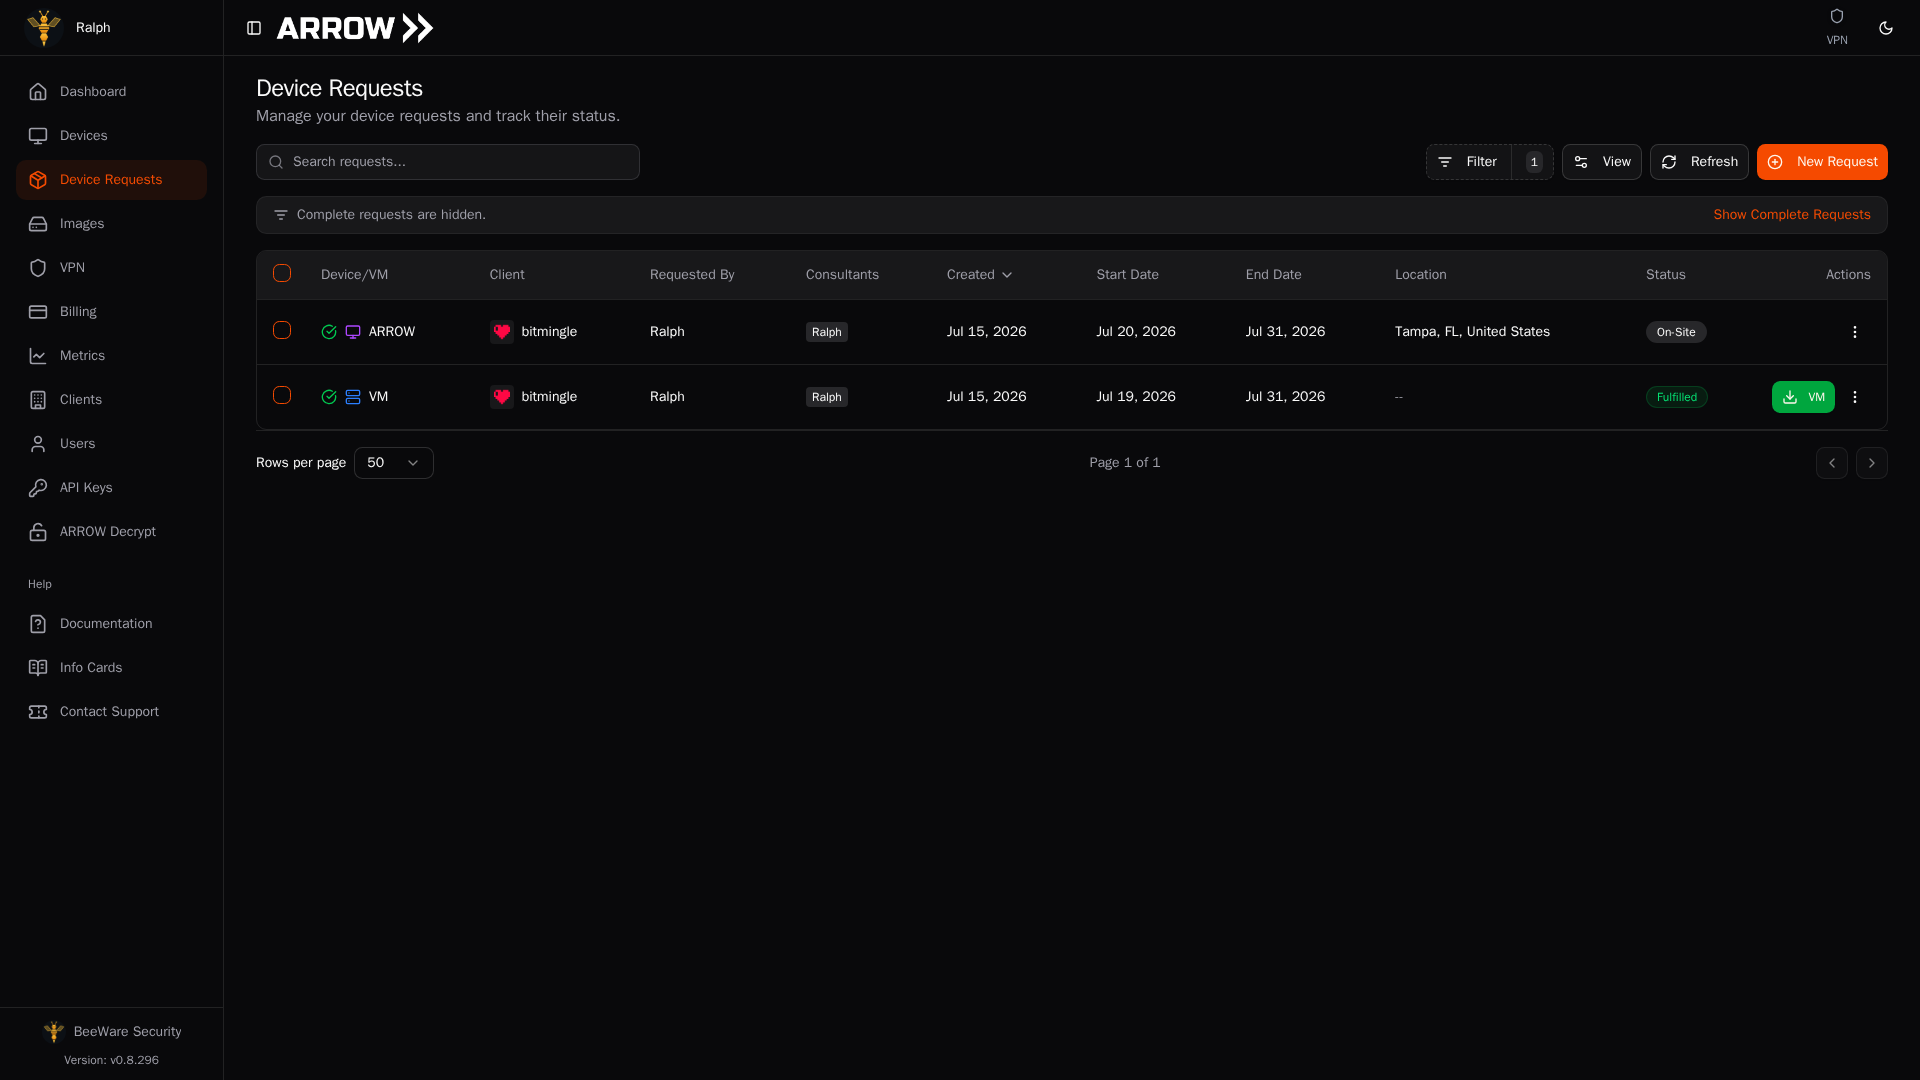
- 1 Start a new device request here.
- 2 Filter the queue from the rail on the left. Completed requests are hidden until you tick Show complete.
- 3 Each request shows the client, dates, location, and status. Click a row to open its details, a fulfilled VM has a download button, and the actions menu holds View Details, Cancel Request, Send setup instructions, and Contact Support.
Click New Request to open the form. It walks you through four numbered steps, Device, Schedule & delivery, Software, and Consultants, with a Request summary panel down the right side that ticks each step off as you finish it. If you cannot submit yet, the line above the Submit Request button names what is still missing. The first step is the device type, and the rest of the form changes depending on whether you pick Physical Device or Virtual Machine.
Physical Device Requests
Section titled “Physical Device Requests”A physical request covers one device per submission. Fill in these fields:
| Field | What it does |
|---|---|
| Device Type | Set this to “Physical Device”. |
| Device Specification | The device you need: ARROW or OBSIDIAN. Each is marked “Available” or “Not available”, and one that is not available cannot be chosen. Once you pick one, the Device Specifications panel shows its CPU, RAM, VM storage, built-in eMMC, ethernet, WiFi, and cellular, as a range where the hardware models behind it differ. The device you receive is one of the hardware models that meet that specification, chosen when your request is approved. |
| Wireless Cards | How many ALFA wireless cards ship with the device (None, 1 Card, or 2 Cards). Choose based on your wireless scope. |
| Client | The client this engagement is for. |
| Delivery Location | Which of the client’s locations to ship to. |
| Request Period | The start date is the day your device arrives (see How the start date works); the end date drives the return. These are commitments, not labels. |
| Images to install | The VM images to load into the device’s App Library so they are ready to deploy on arrival. Up to 200GB in total; the form keeps a running total and will not let you add an image that would push you over. |
| Consultants | The team members assigned to the engagement. |
Long-term deployment sits under the dates. Turn it on when the device stays on site indefinitely, such as for recurring quarterly testing. The end date becomes optional, the device drops out of return reminders, and standard billing still applies.
The device specification is worth thinking about, because the two models suit different jobs:
Which device should I choose?
- ARROW is the compact, cost-effective workhorse, with an Intel N5105 (4 cores), 8GB RAM, 512GB encrypted NVMe, and one Gigabit ethernet port. It is right for most engagements, including standard testing, travel, and anywhere a smaller, simpler device fits.
- OBSIDIAN trades size and price for far more compute, with an Intel i5-1340P (12 cores), 32GB RAM, 1TB encrypted NVMe, dual 2.5GbE, and Thunderbolt 4 expansion. It is right when the work outgrows the ARROW, such as hosting VMs on the device, processing large datasets, or multiple high-speed network links.
See the full specifications and comparison if you are on the fence.
The OBSIDIAN is a premium device and is priced above the standard ARROW. How the premium applies depends on your plan, and the request form shows the exact terms for your plan when you select it. See OBSIDIAN pricing or contact support for a precise quote.
Three optional fields sit behind Additional details at the bottom of the form, collapsed so they stay out of your way: an Opportunity Number for your internal project tracking, Notes for any special instructions about the request, and Tags for labelling the request so you can sort and filter on it later. A tag takes a label, an optional category, and a color; on a request for several VMs, the tags apply to all of them.
Timing is the thing people get burned on, and it all hangs on one field, so it has its own section below.
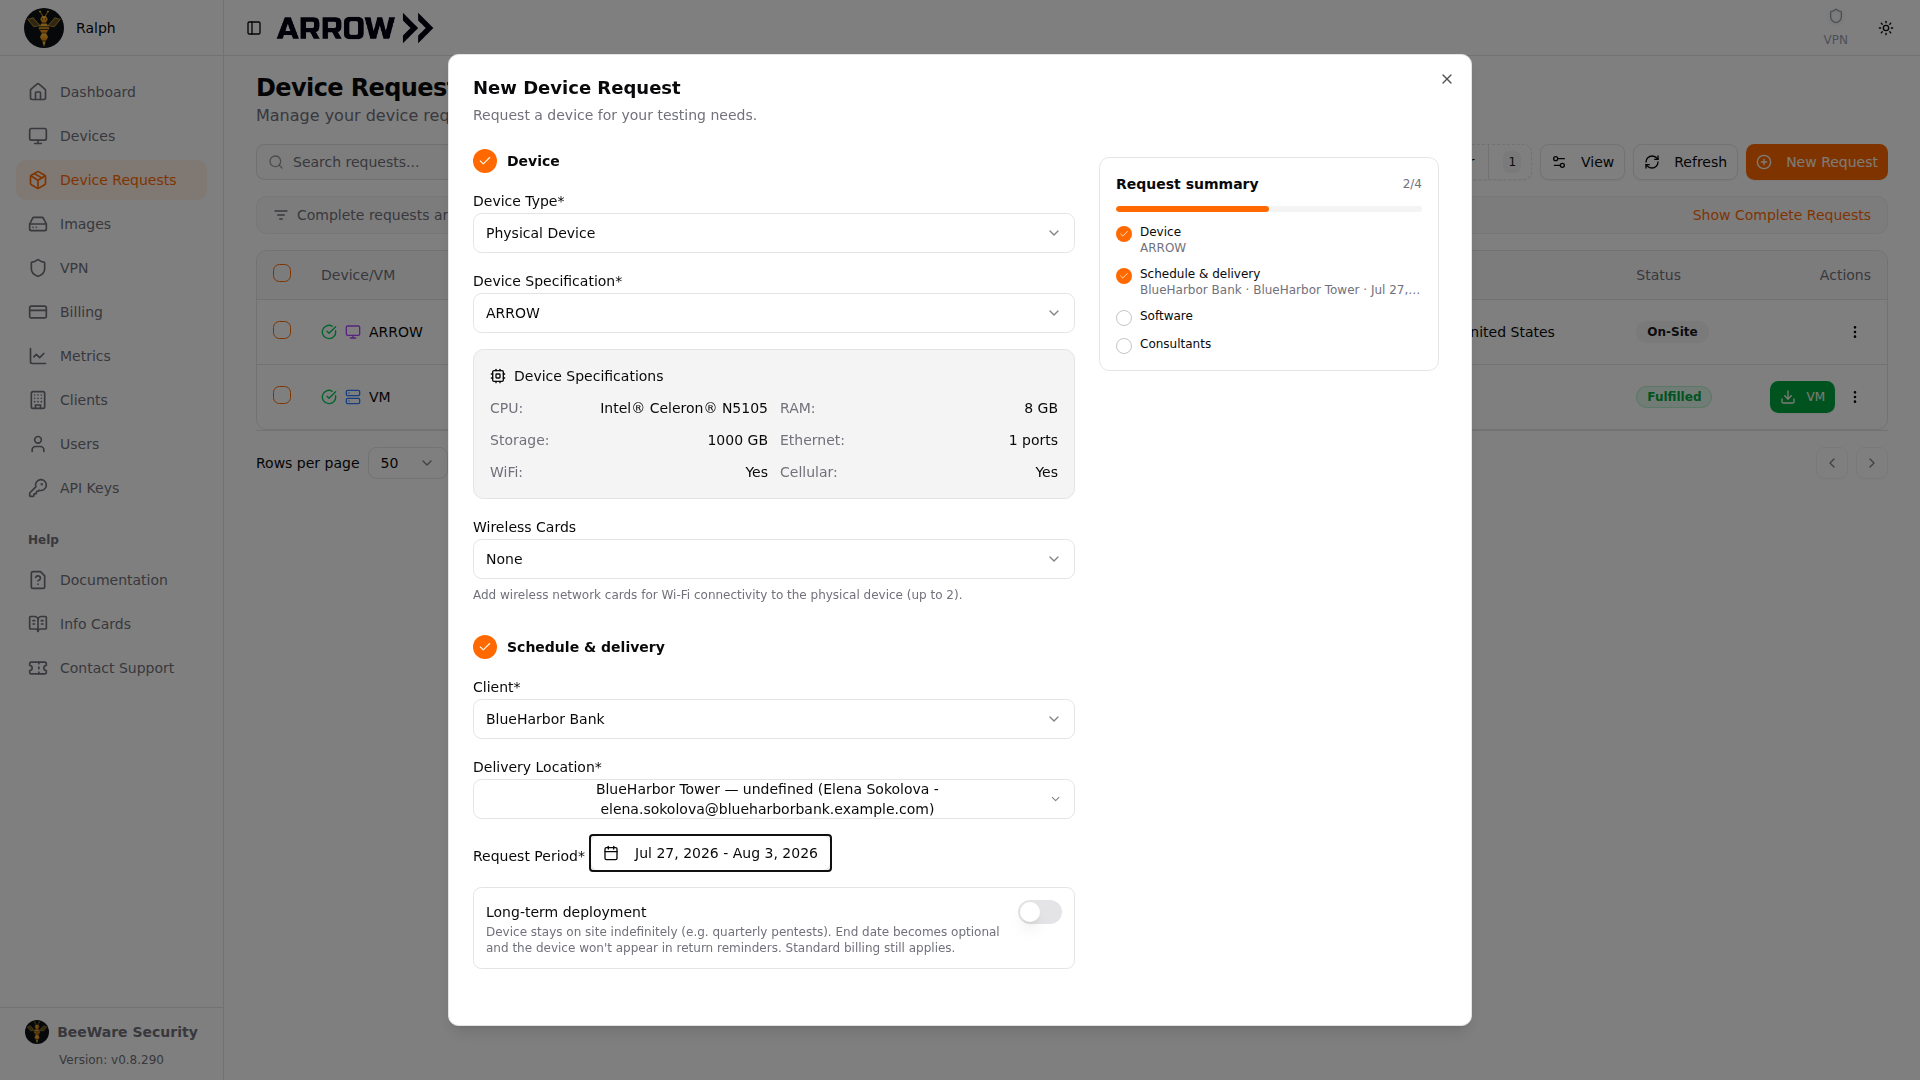
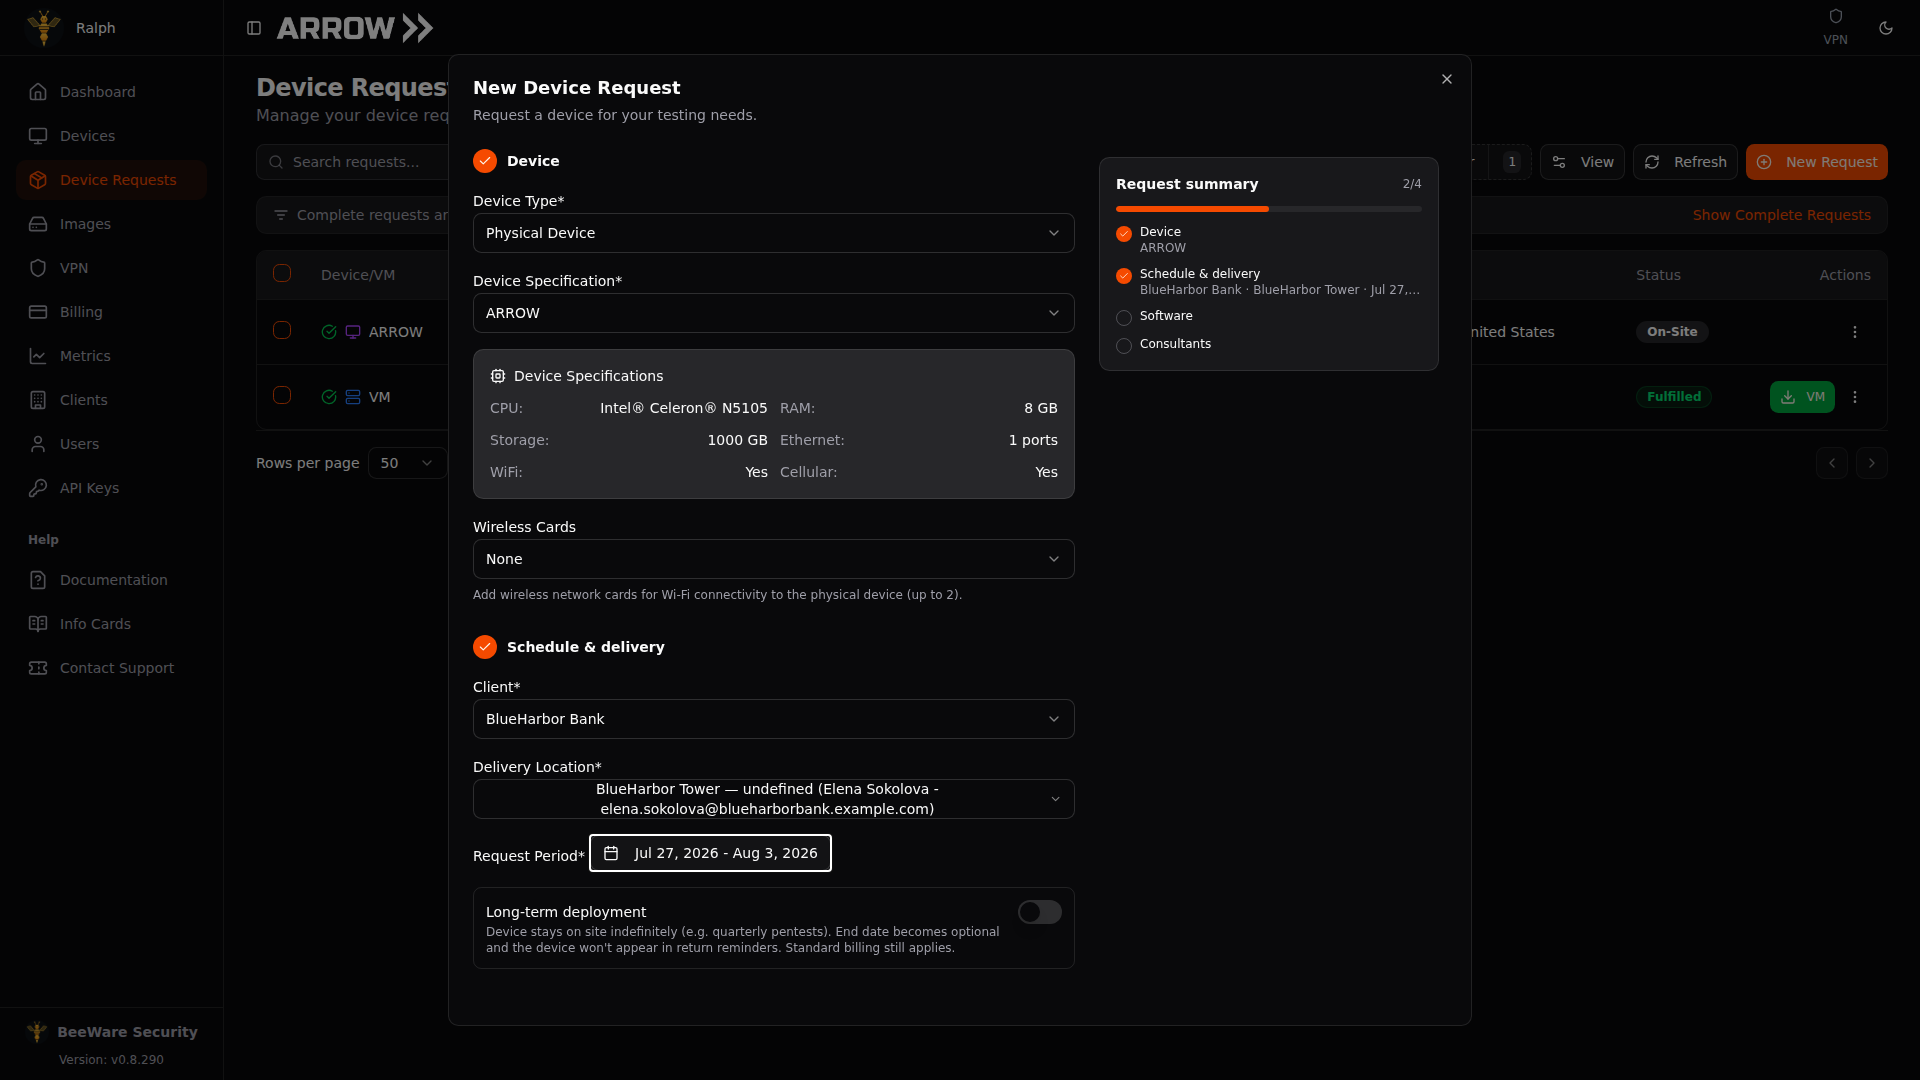
The New Device Request dialog with Device Type set to Physical Device
The New Device Request dialog with Device Type set to Physical Device
Submitting a physical request opens Confirm the delivery address before anything is filed. It shows the exact address the shipping label will be built from, the receiver the carrier contacts on delivery, and the date the device has to arrive by. Read it, because a wrong location does not surface anywhere else until a parcel lands at the wrong building, and your organization is billed for that shipment plus the replacement. Click Confirm and submit to file the request, or Cancel to go back and pick a different location. If you asked for rush shipping on a date that standard two-day delivery would reach anyway, the dialog warns you here.
Once you submit, the request goes into the queue for approval. After it is approved, your device is configured, packaged, and given a shipping label. You get an email with tracking information when it ships, and the same tracking shows up on the Device Requests page.
How the start date works
Section titled “How the start date works”The start date is the day your device arrives. It is not the day we start working on the request, and it is not a rough note about when your project begins. We ship to land on that exact date, and never after it.
So set it to the day you want the device in your hands. If your engagement starts on a Monday and you want the device on site the Friday before, put Friday, not Monday.
A few things the portal handles for you:
- Weekends. Transit is counted in business days, so a two-day shipment sent on a Friday arrives Monday. You do not need to pad the date to route around a weekend. A start date that lands on a Saturday or Sunday is delivered the Friday before, because the carriers do not deliver on those days.
- Same-day cutoff. Requests are processed until 6 PM Eastern. Anything after that starts the next business day, and the form tells you when that pushes your earliest possible date out.
- Dates we cannot reach. The form will not let you pick a start date that no service can make. If your date is reachable by overnight but not by standard shipping, it offers Need it faster? Add rush shipping and asks for a reason before you can submit.
Rush shipping is next-day air, offered when your start date is too soon for standard two-day delivery. It is best effort, not a guarantee. On a weekday, next-day air means the following business day. Over a weekend it usually means Monday, so a rush shipment sent Friday arrives Monday rather than Saturday.
None of our delivery dates are guaranteed. Carrier estimates are estimates, weather happens, and we tell you what we expect rather than what we can promise.
What early and late delivery cost you
Section titled “What early and late delivery cost you”Delivering early is not free, and what it costs depends on your plan:
- UAP Plus. Your allocation is a pool of concurrent device time. A device occupies a slot from the moment it is delivered, whether or not your engagement has started, so shipping a device out early spends part of your allotment on a device sitting in a box. This is the main reason to keep the buffer short.
- Pay-as-you-go. Billing does not start early. If the device arrives before your start date, the clock starts on the start date itself. If it arrives on the start date, billing starts at the hour it lands. If it arrives after your start date, billing starts at the hour it lands then too, so a late delivery is never billed as if it had been on time.
Once the device is delivered, open the request and the Deployment Schedule card shows, under the dates, whether the delivery landed on the start date, a number of days early, or a number of days late. If something looks wrong there, that is worth a support ticket.
See Billing for how device hours turn into charges.
Virtual Appliance Requests
Section titled “Virtual Appliance Requests”Virtual appliances are the answer when you cannot ship hardware. You can request up to 10 VMs in a single submission. Fill in these fields:
| Field | What it does |
|---|---|
| Device Type | Set this to “Virtual Machine”. |
| VM Quantity | One VM unless you say otherwise. Turn on Request multiple VMs for this engagement to pick a Number of VMs, from 1 to 10. |
| VM Configuration | Shown once you ask for more than one: a unique name for each VM (for example, “US East” or “NYC HQ”) so you can tell them apart later, plus its own type and network settings. |
| Hostname (optional) | The VM’s own system hostname. Leave it blank and ARROW generates one. The image name is never part of the hostname. |
| VM Type | The output format for the client’s hypervisor: VMware (OVA), VirtualBox (OVA), QEMU/KVM (QCOW2), Azure (VHD), AWS (AMI), GCP (raw.tar.gz), or Hyper-V (.vhdx). Match this to what the client actually runs. |
| Static IP (optional) | A fixed address, gateway, and DNS for each VM, for sites with no DHCP. Leave it blank to use DHCP (the default). ARROW bakes the address into the image. See Static IP Addressing. |
| VMware compatibility (optional) | Shown only for VMware VMs. Sets the maximum hardware version of the delivered OVA. Leave it at Default unless the target ESXi or vSphere host is older and rejects newer versions (for example, ESXi 6.7 supports up to vmx-15). A lower version imports on older hosts. |
| Client | The client this engagement is for. |
| Request Period | The start and end dates of your engagement. |
| Images to install | The VM images to include in the App Library, up to 200GB in total. |
| Consultants | The team members assigned to the engagement. |
There is no delivery location to choose for a VM. Delivery Method simply confirms the appliance is delivered online, and the download link appears in the ARROW Platform once the build is done.
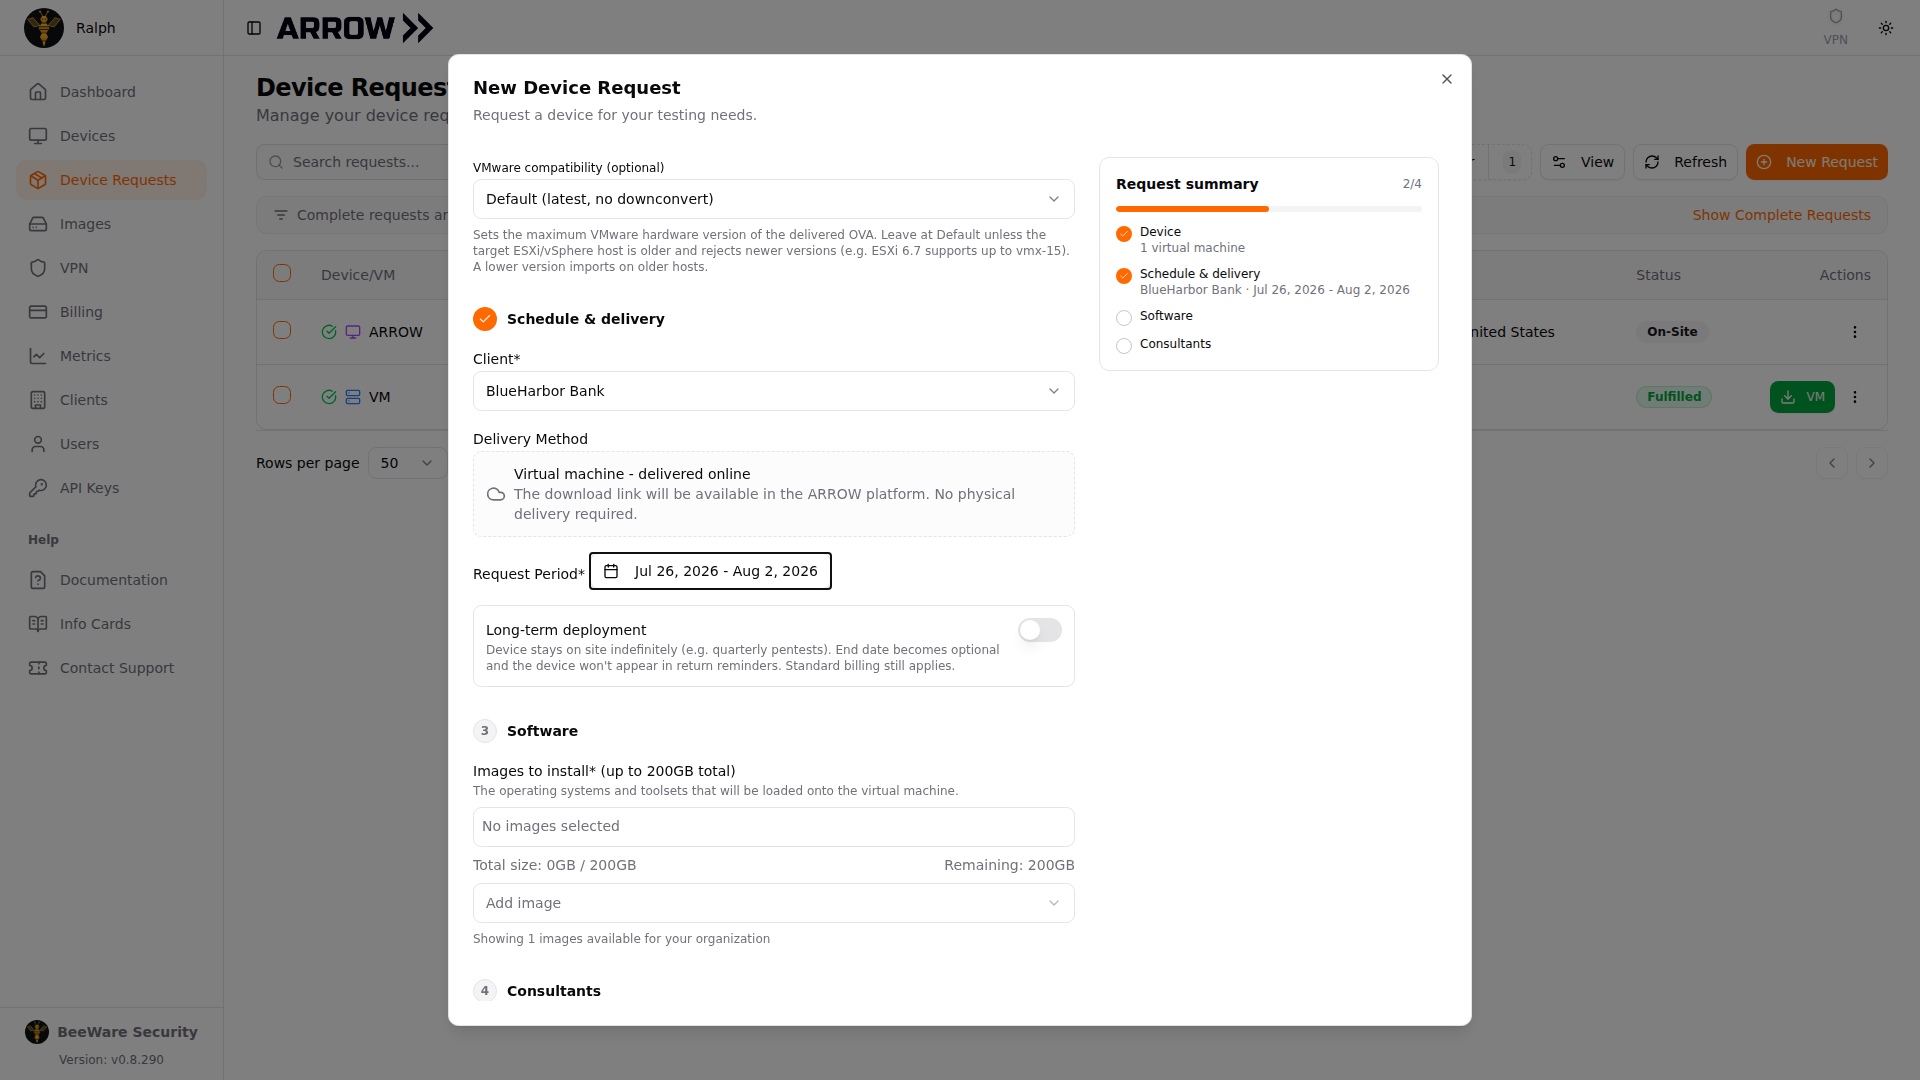
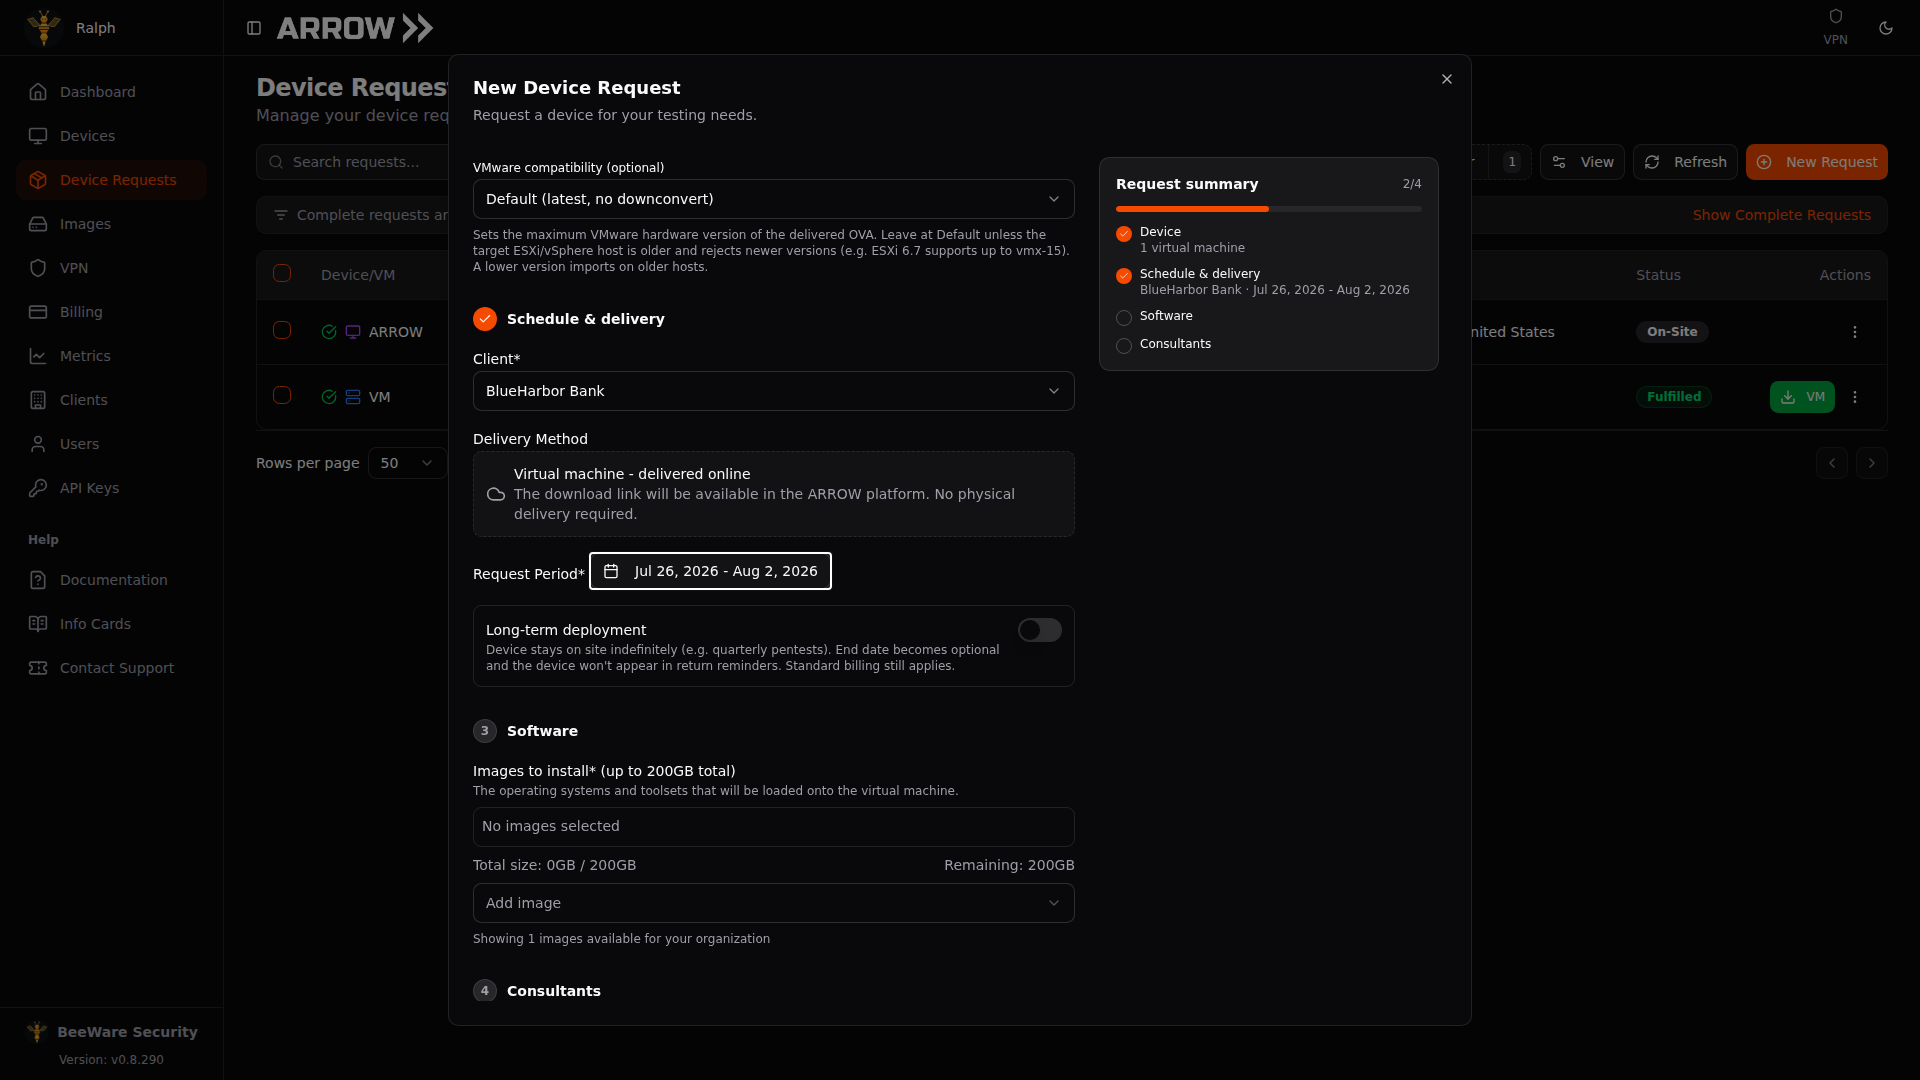
The New Device Request dialog with Device Type set to Virtual Machine, showing VM type and delivery options
The New Device Request dialog with Device Type set to Virtual Machine, showing VM type and delivery options
After you submit, the request goes into the queue. Once approved, VM imaging starts automatically, the status moves to “fulfilled” when the images are ready, and download links appear in the portal.
Tracking Your Requests
Section titled “Tracking Your Requests”Every request lives in the Device Requests table, and each row is a quick read on where things stand. You will see the request type (with an icon for physical versus virtual), the client, who requested it, the assigned consultants, the created, start, and end dates, the delivery location (blank for VMs), and the current status. The Actions menu on the right holds per-request options, and fulfilled VM requests get a VM download button right there in the row.
Click a row to open the request in a details drawer on the right. The drawer keeps up to five requests open as tabs across the top, so you can work through several without losing your place, and you can drag its left edge to make it wider. Progress at the top plots the request against its lifecycle stages, with a link to show every stage when you want the whole path rather than just where it is now. Below that, Overview covers the client, schedule, consultants, and notes; Shipping holds the setup instructions for the site, the delivery location, and tracking for physical devices; and Build holds imaging status, the Hardware Specifications for a physical device, and, for VMs, the download links.
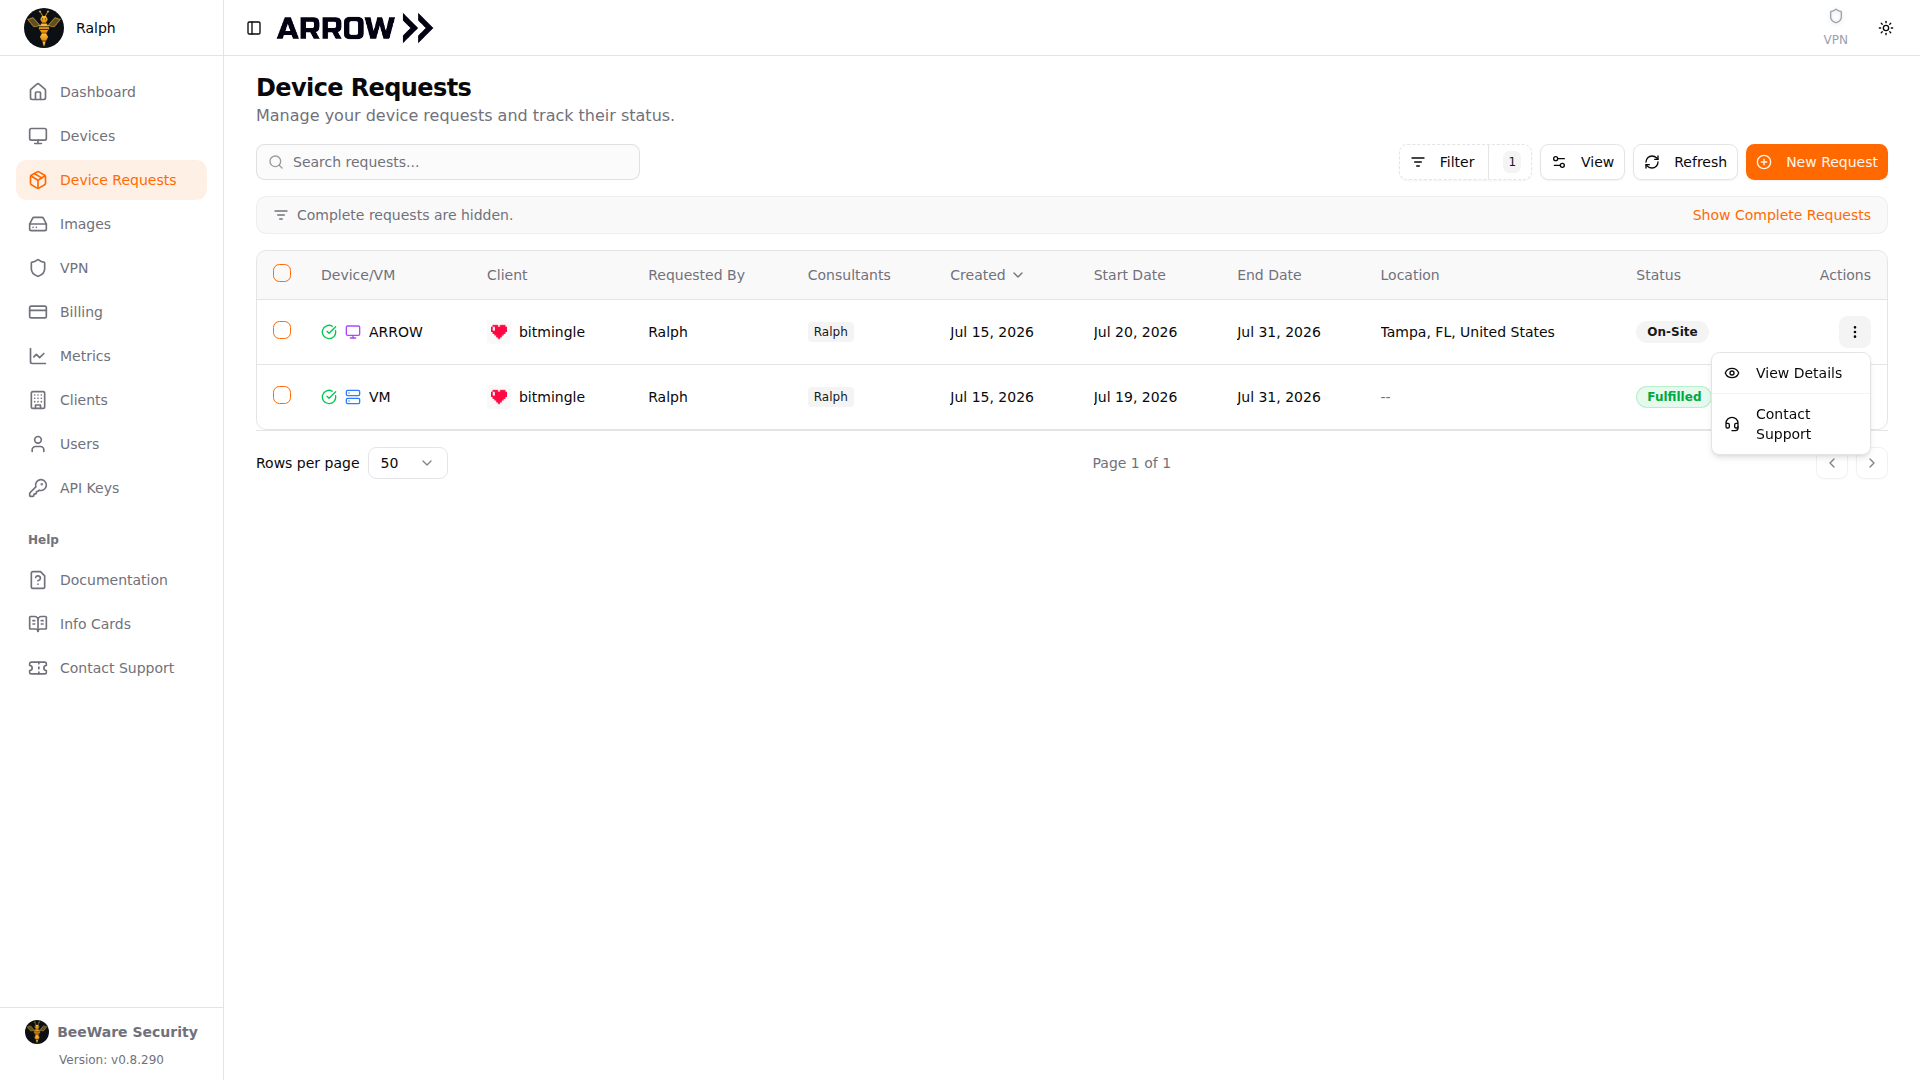
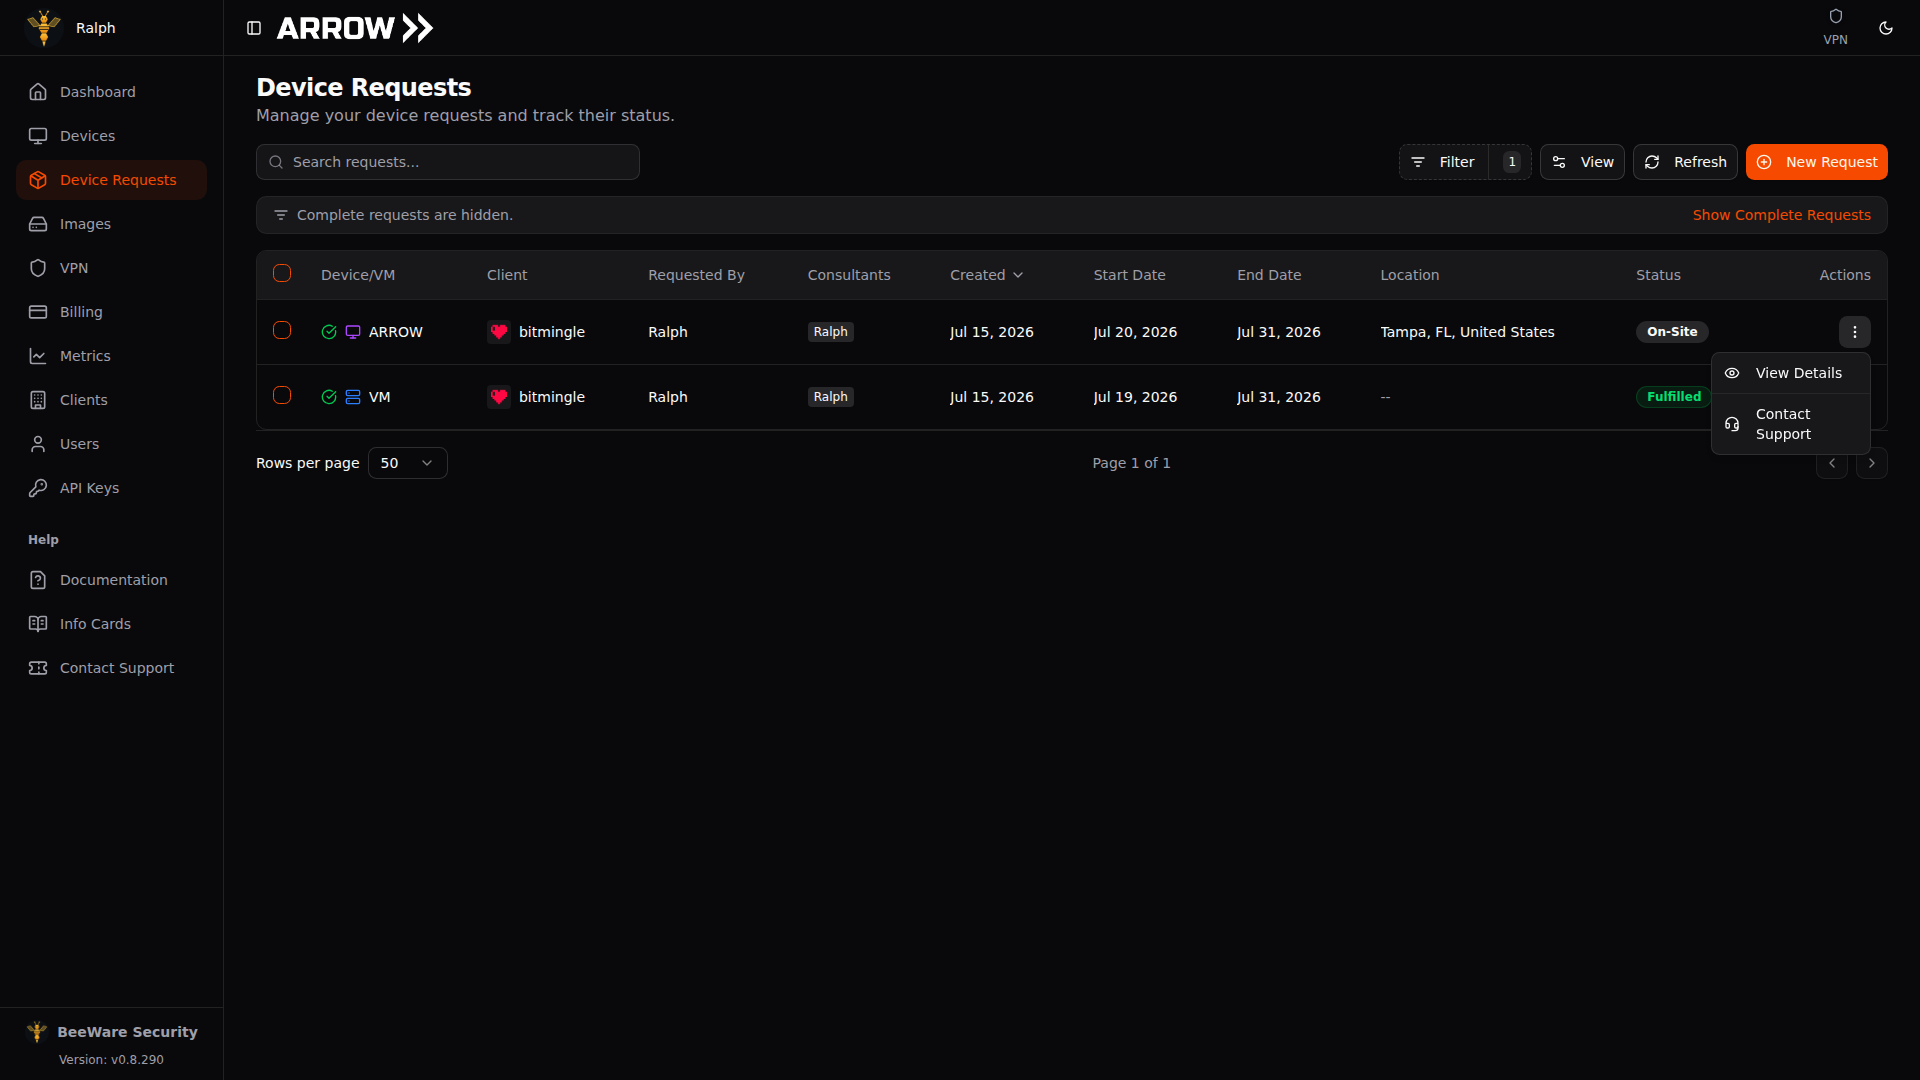
The per-request Actions menu, with View Details and Contact Support
The per-request Actions menu, with View Details and Contact Support
Contact Support, in a row’s actions menu or the drawer’s action bar, opens Submit a Support Ticket with the subject and the request’s details already filled in under Device Information, so you only have to say what is wrong. Attach screenshots or files if they help, and click Submit Ticket. The dialog gives you the ticket number and a View ticket button. ARROW support replies in the ARROW Platform and by email, and you can follow the ticket, along with every other one you have raised, under Support in the sidebar.
Status tells you what stage a request is in:
| Status | What it means |
|---|---|
| Pending | Submitted and waiting for approval. |
| Approved | Approved; your device is being prepared. |
| Fulfilled | The physical device has been imaged, or the VM is ready to download. |
| Shipping | Label created, device ready for pickup. |
| In Transit | The device is with the carrier. |
| Delivered | The carrier has dropped the package off. |
| On-Site | The physical device has been delivered and is operational. |
| Complete | The engagement is closed out. |
In short, a request moves from submission into the queue for approval. Once approved, a physical device is prepared, labeled, and shipped to the client, while a virtual appliance is imaged and made available for download. A physical request then runs through the carrier stages to on-site and, at the end of the engagement, back through the return leg. Either way, the request finishes as complete.
Getting to Tracking and Downloads
Section titled “Getting to Tracking and Downloads”For physical devices, tracking is in two places. Open the request from the Device Requests page and go to the Shipping tab. Once the carrier has scanned the package, Shipping Tracking leads with where it is right now, giving you a map of the latest scan, the city and state it happened in, the status of that leg, how long ago the scan was, and an Est. delivery date when the carrier has given one. If the scan location cannot be mapped, you still get it as text. Below that are the carrier, the status, and the outbound and return tracking numbers, each of which links straight to the carrier and can be copied with one click. If the return label has expired or the carrier refuses it, Request new label under the return tracking number replaces it; see Lost the label? Print another one. Once the device starts its return leg, the map follows it back. You will also get an email with the tracking details the moment it ships.
For virtual machines, once a request is fulfilled you can download from either the request details or the Devices page. In the request drawer, the Build tab lists each VM with a Download VM button and, where it is offered, Copy Link. Download VM, like the VM button in the request’s row, opens a download page in a new tab that checks your access, prepares a link, and starts the download. The page also shows the file name, its size, when the link expires, and a SHA-256 checksum you can use to confirm a multi-gigabyte file arrived intact. Links are generated fresh on each download and expire seven days after they are created, so reopen the page for a new one rather than reusing an old link. If nothing opens, allow pop-ups for the ARROW Platform. While a VM is still being built, the Build tab says so. If its build failed or produced no file, the tab tells you that instead and offers Contact Support, and we will rebuild it. On the Devices page, each VM card shows a VM Image row with Download and Copy URL buttons as soon as the image is ready.
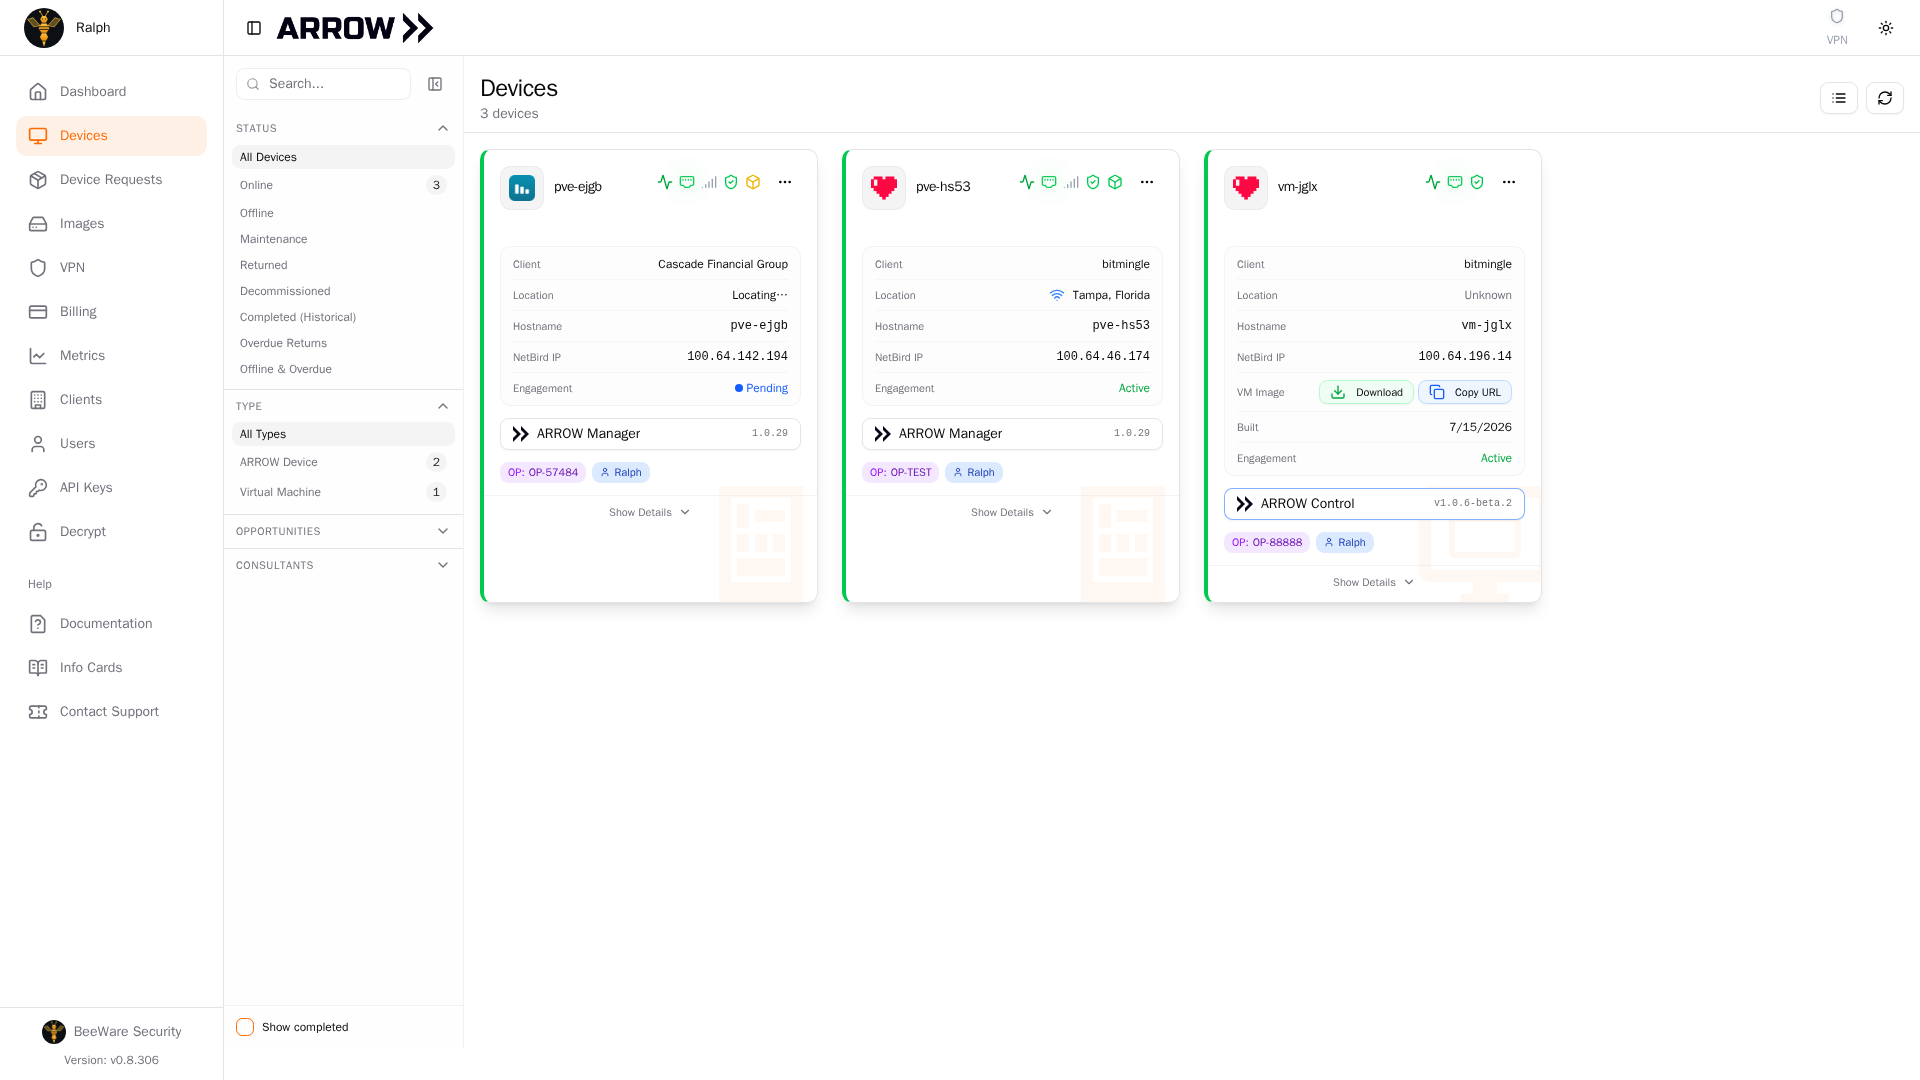
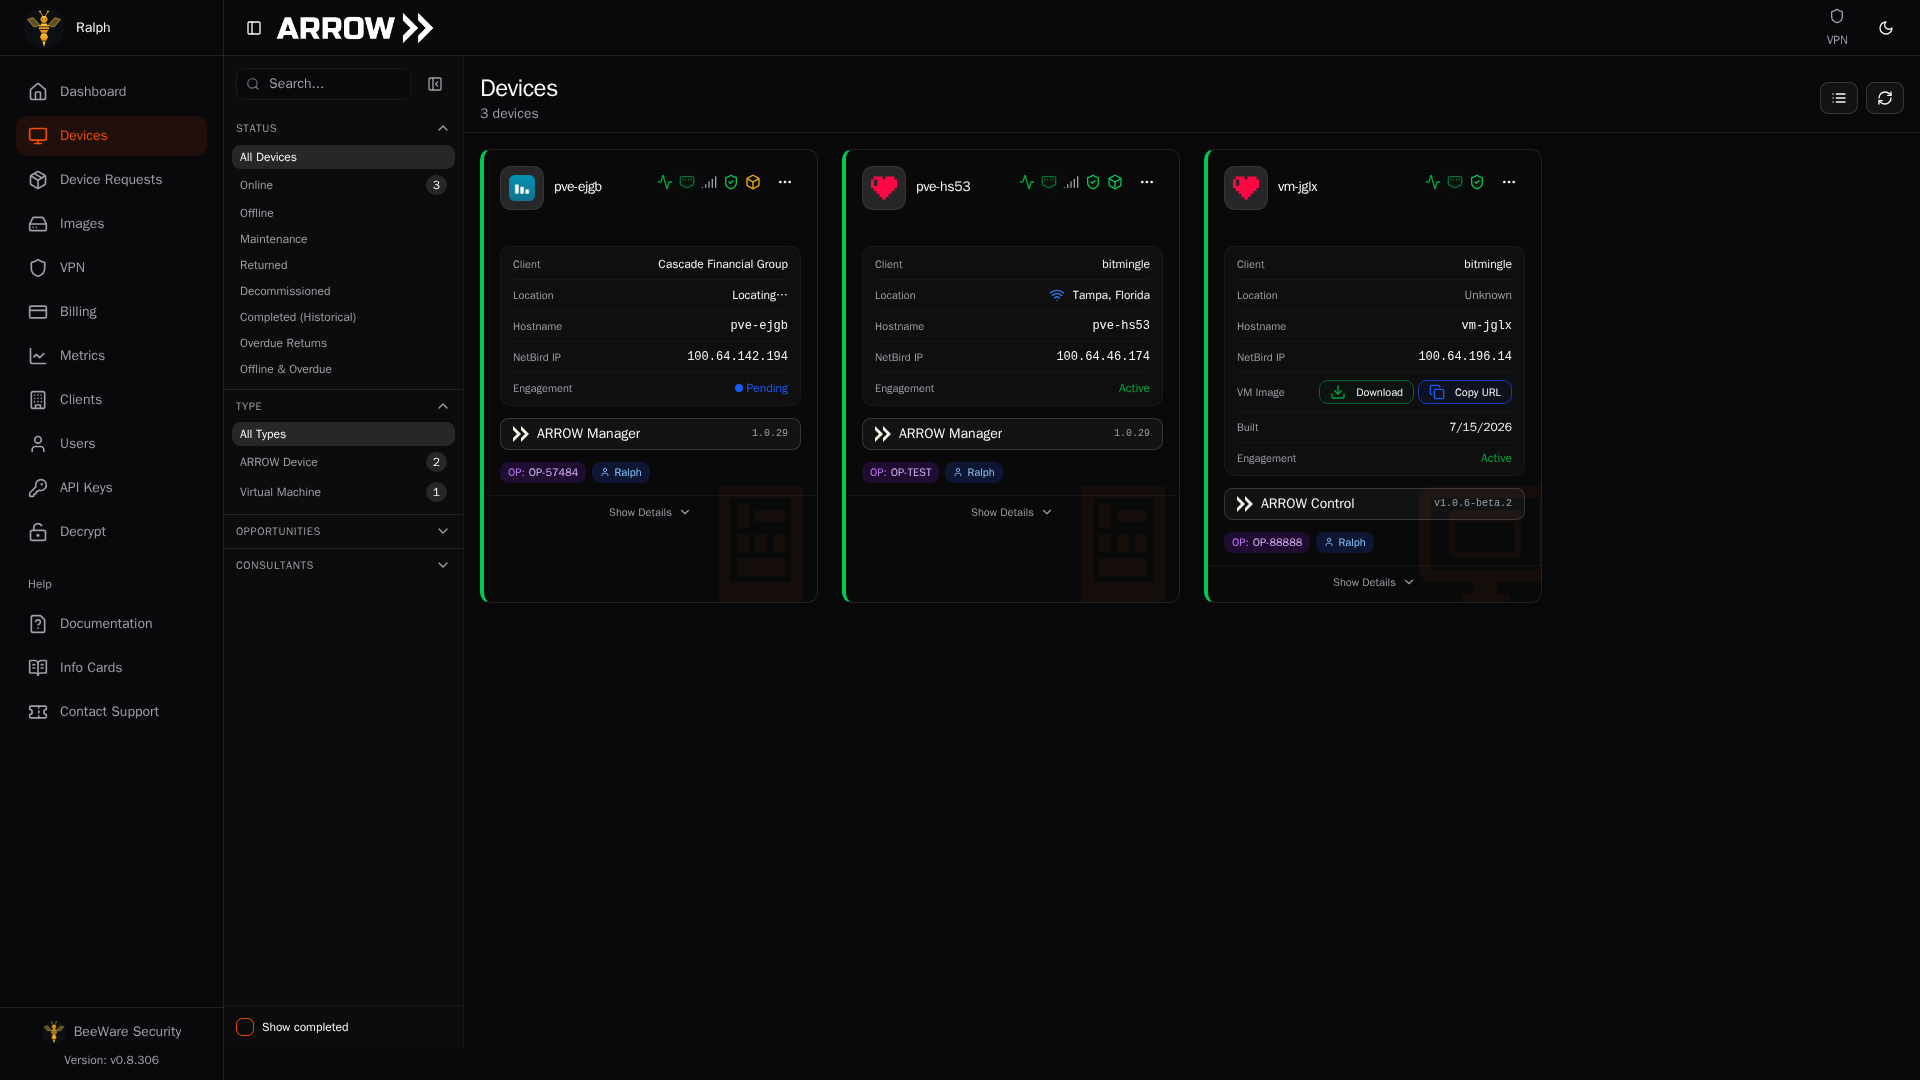
A virtual machine device card with the Download and Copy URL actions for the VM image
A virtual machine device card with the Download and Copy URL actions for the VM image
Sending Setup Instructions to the Site
Section titled “Sending Setup Instructions to the Site”A physical device only comes online if the site’s firewall lets it out, and the people who make that change are usually the client’s IT team, who have no ARROW account. Send them the setup instructions before the device arrives, so the firewall ticket is filed in time rather than after the box is sitting on a desk.
Open the request, go to the Shipping tab, and find Setup instructions for the site at the top. Click Send setup instructions, or choose Send setup instructions from the row’s actions menu on the Device Requests page. The option is there for physical requests that are still open; a virtual machine has no box to receive, and a canceled, denied, or complete request has no device on its way. Sending works once the request is approved and a device has been assigned to it, because the link in the email is made for that device. Until then, or once the device is on its way back, the card tells you why it cannot be sent. You can send for a request you raised yourself, or for any request if you manage your organization’s device requests.
In the dialog:
- Add the recipients in To. The client’s primary point of contact is filled in for you, and the client’s other contacts are offered as buttons underneath. Type any other address and press
Enteror a comma to add it. You can send to up to 10 people at once. - Leave Send me a copy ticked if you want the message in your own inbox too.
- Add a Personal note (optional) if the site needs to know something specific, such as which switch port to use or when to expect the delivery. It is plain text, up to 1000 characters.
- Check The email includes and click Send.
The email carries the one firewall rule the device needs, with your VPN address filled in, the carrier and tracking number once a shipping label exists, and a link to your organization’s setup guide, the same page the QR code on the card in the box opens. The emailed link carries the device’s serial number, so it opens the guide straight away, while anyone who scans the QR code is asked for the serial from the label on the device first. See Receiving an ARROW Device for what the site sees there. It arrives from your organization via ARROW, everyone you listed receives the same message, and replies come to you.
Once it has gone, the card shows when it was last sent, by whom, and to how many recipients at which domains, and the button becomes Send again. If the device has shipped and nothing has been sent yet, the card says so, because that is the last moment to get the firewall change in place. Each request can be sent a limited number of times a day; if you reach the limit, the dialog tells you and you can try again tomorrow. If the card tells you your organization’s setup page is switched off, contact VTEM Labs support.
Managing Active Requests
Section titled “Managing Active Requests”Project timelines move, and the request follows. To change dates, go to the Devices page, open the […] menu on your device, and choose Edit Request Details. From there you can adjust the start or end dates and save. The same dialog lets you update the assigned consultants, opportunity number, and notes. Changing the assigned consultants takes permission to manage devices or device requests; without it you can still save the dates, opportunity number, and notes.
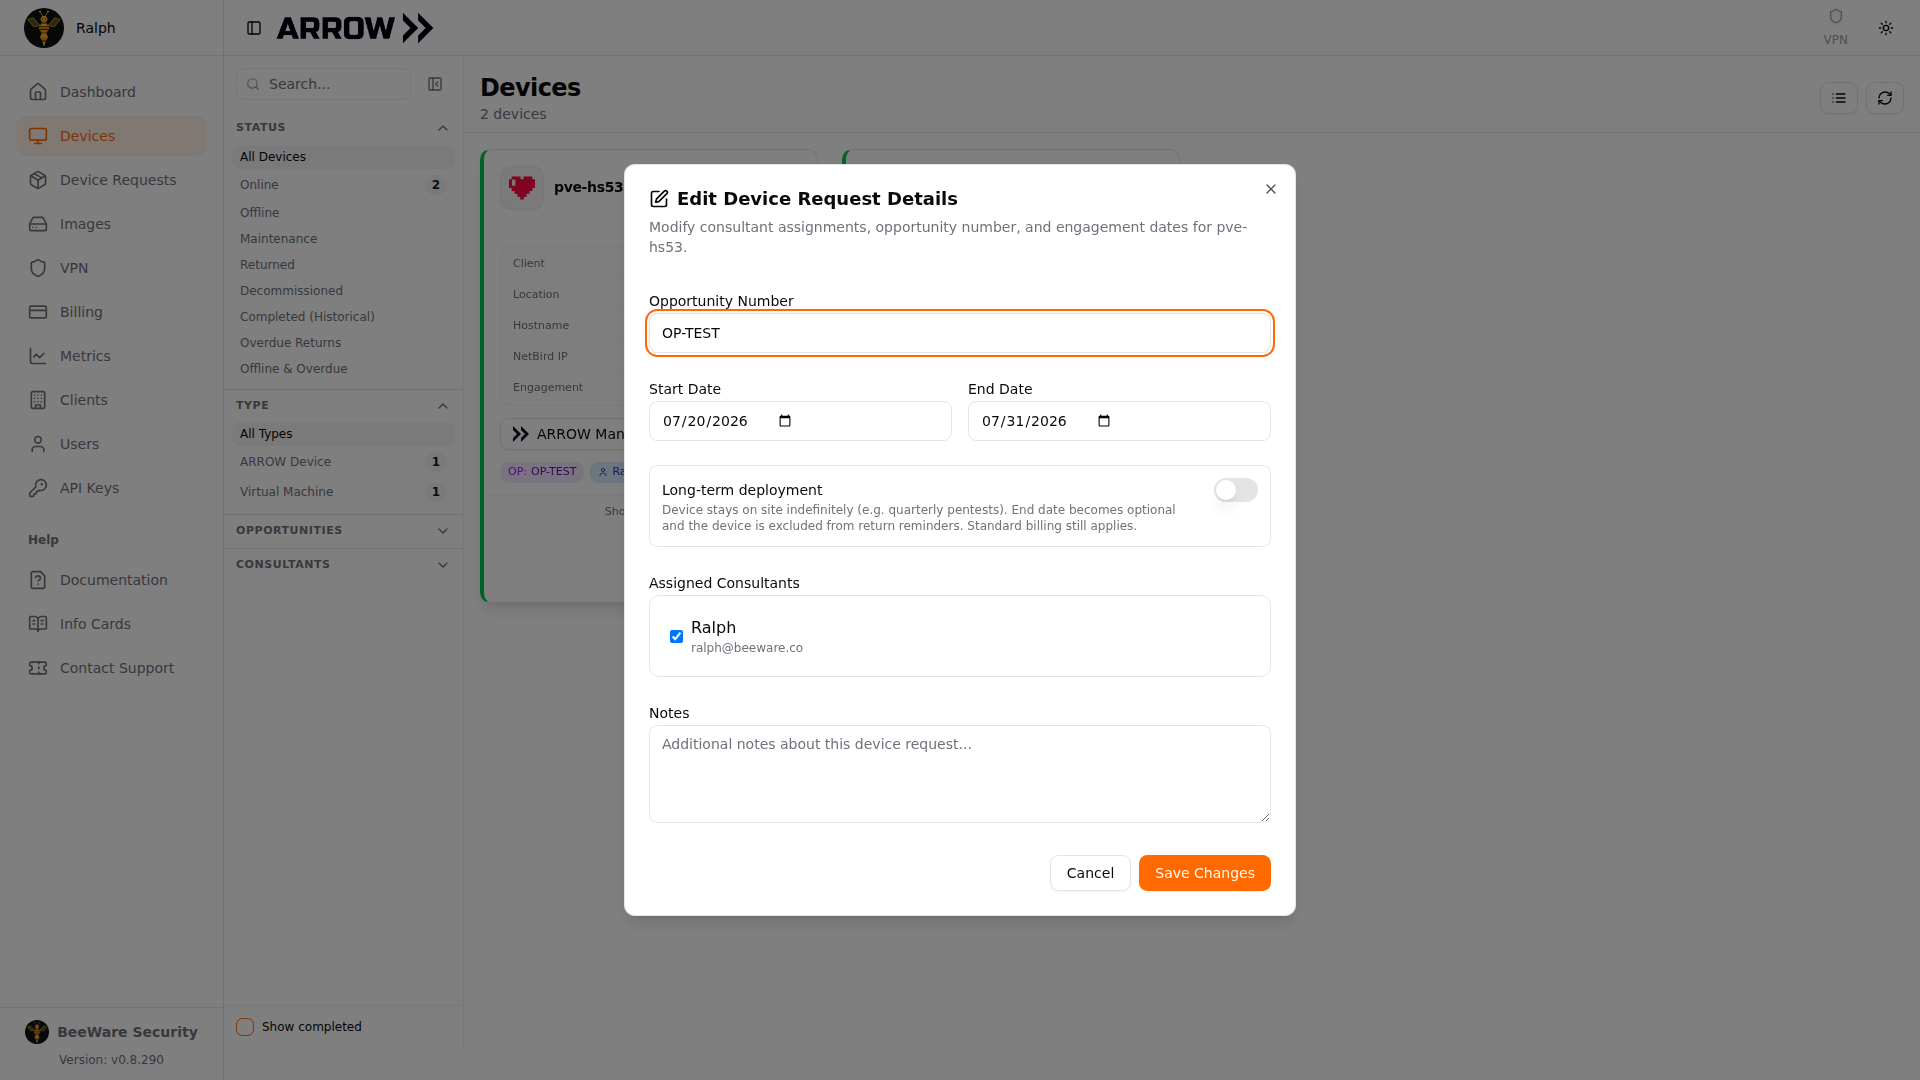
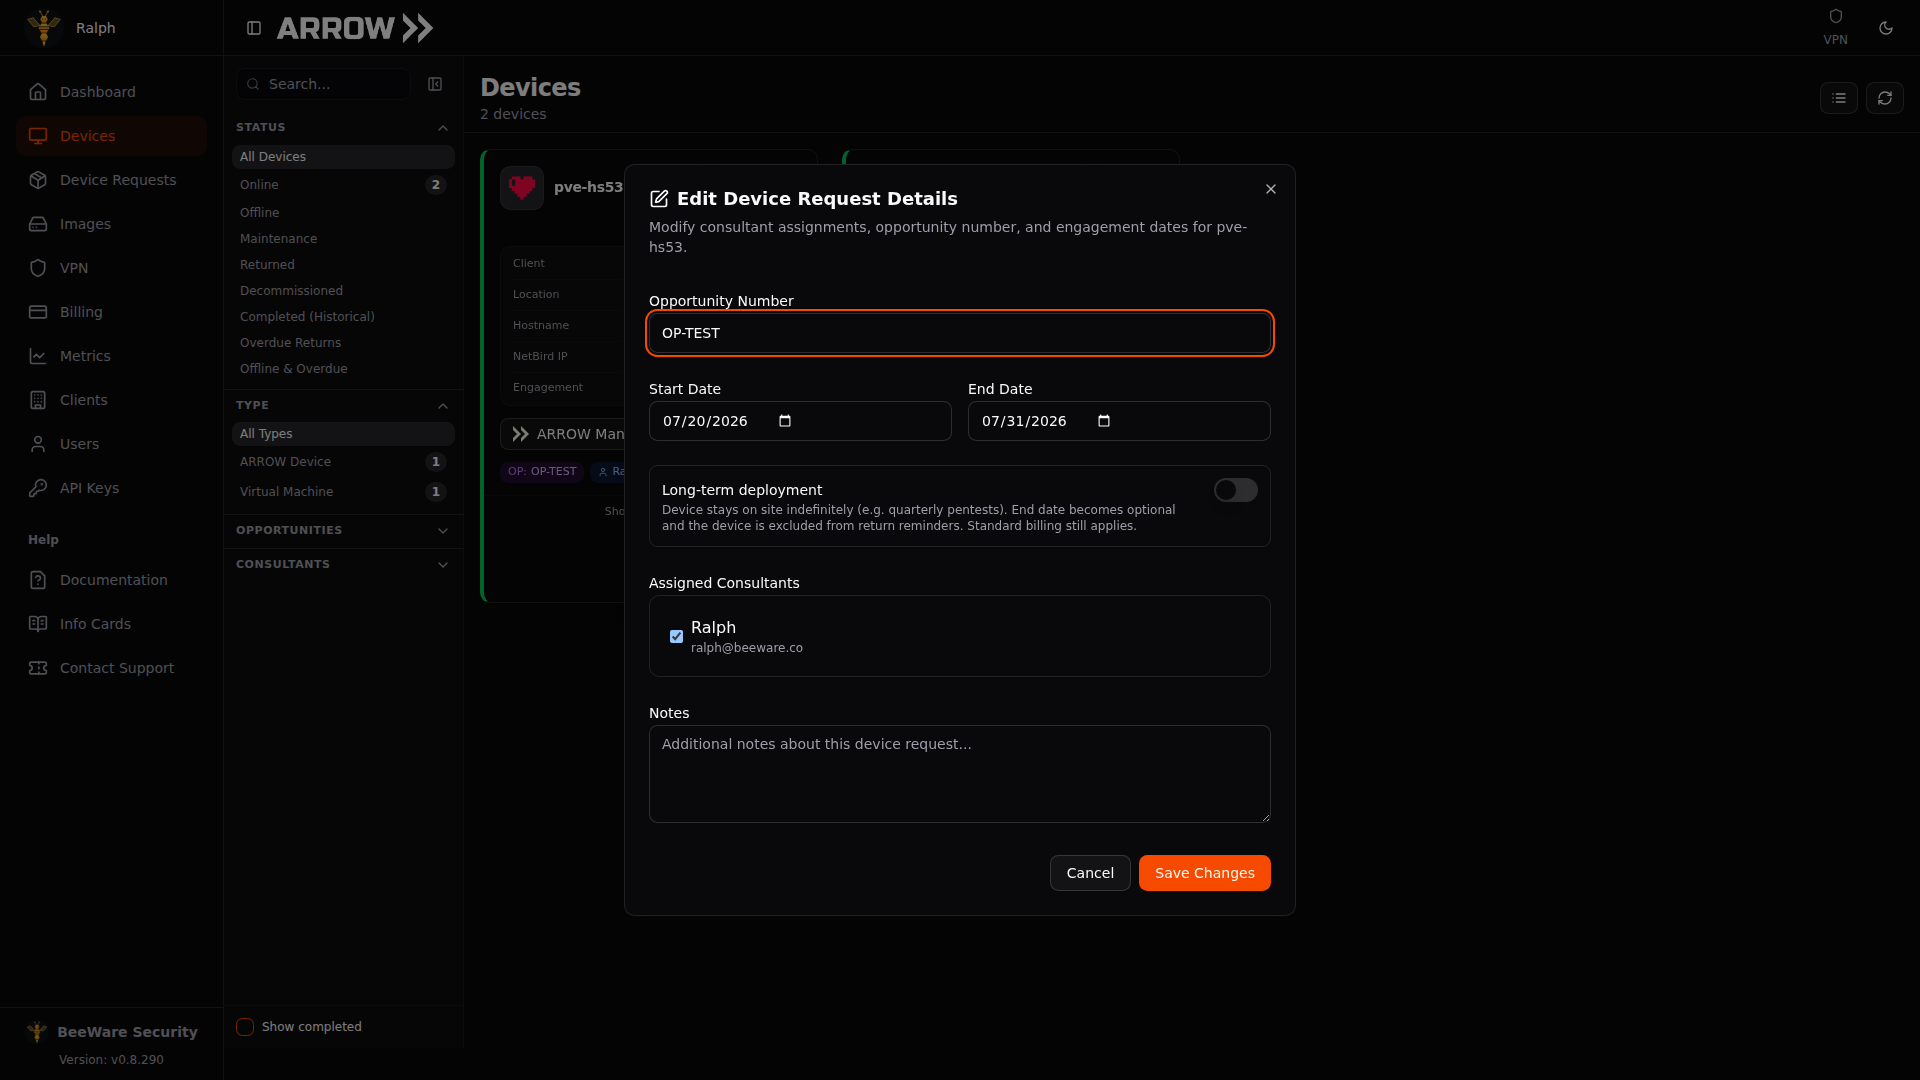
The Edit Device Request Details dialog, where you adjust the engagement dates, consultants, opportunity number, and notes
The Edit Device Request Details dialog, where you adjust the engagement dates, consultants, opportunity number, and notes
The Long-term deployment toggle in this dialog is worth knowing about. Turn it on when a device stays on site indefinitely, such as for recurring quarterly testing. The end date becomes optional, the device drops out of return reminders, and standard billing still applies.
You can also edit from the Device Requests page itself. Open the request and use Edit Request in the drawer’s action bar, or the Edit button on the Deployment Schedule card when the dates are all you need to change. While a request is still pending you can change its dates, opportunity number, and notes. Once it is approved, only the testing dates are editable.
Notes are the one field you cannot empty. You can replace them with different text, but saving with the Notes box cleared leaves the existing notes in place, so the context you wrote when you raised the request is not lost to a later edit.
The delivery address is changed on the request itself. Open the request, go to the Shipping tab, and click Update address on the Delivery Location card. Update delivery address opens with the street address, city, state or province, postal code, and country the label will carry, plus the Delivery contact the carrier calls when a delivery needs a signature. Correct what is wrong and click Save address. When the address matches one of the client’s saved locations, a tickbox at the bottom offers to correct that location on the client record as well, so the next request starts from the right address; it is on by default, and you clear it for a one-time delivery somewhere else. Editing the client on its own does not redirect a request that already exists, which is why this lives on the request. Update address is only offered while the destination can still change. Once a shipping label has been purchased the address is fixed: the button stops appearing, or the dialog tells you the label already exists instead of showing the form. Contact VTEM Labs support at that point if the device has to go somewhere else.
To cancel a request while it is still pending, open it and click Cancel Request in the drawer’s action bar, or choose Cancel Request from the row’s actions menu. Nothing has been reserved or built yet at that stage, so it cancels on the click with no confirmation step. You can always cancel a request you raised yourself; cancelling someone else’s request takes permission to manage device requests. After a request has been approved, Cancel in the action bar asks you to confirm first, and the option disappears once cancelling is no longer possible, which for a physical device means as soon as it ships. At that point, contact VTEM Labs support.
When a VM engagement is finished, open the request and click Mark Complete. The button appears once the request is fulfilled. You can complete a request you raised yourself; completing someone else’s takes permission to manage device requests. You have to confirm that the work is genuinely done, because completing closes the engagement and the request cannot be reopened. It does not delete the VMs from your client’s hypervisor, but it removes them from the ARROW VPN straight away, so they can no longer reach, or be reached through, ARROW. If a VM is still online when you complete it, ARROW tells you so. Do not use it just to tidy up the list. Mark it complete when the project ends, not when you download the VM.
Common Scenarios
Section titled “Common Scenarios”Several devices for one engagement. Physical devices are one per request, so submit a separate request for each. Virtual appliances are different, and you can request up to 10 VMs in one submission.
The delivery location changes. Open the request, go to the Shipping tab, and use Update address on the Delivery Location card. That works until a shipping label has been purchased; after that, contact VTEM Labs support to redirect it.
Your dates move. Edit the request. Moving the start date moves the day we ship, so change it as soon as you know rather than the week of. Bringing a start date forward can push the request into the rush window; the edit dialog tells you when it has.
You need it fast. Put the date you actually need the device in and let the form work it out. If the date is only reachable by overnight, it offers you rush shipping and asks for a reason. If the date is not reachable at all, it tells you the earliest date that is, and you should contact VTEM Labs support if that does not work for you. Either way, turnaround still depends on current device inventory.
Related Documentation
Section titled “Related Documentation”Hardware Specifications:
- ARROW Device - Full specifications, setup, and connectivity guide
- OBSIDIAN Device - Full specifications, setup, and connectivity guide
Portal & Management:
- Device Management - Manage provisioned devices and settings
- Device Shipments - Track shipments and delivery status
- Export and Deployment Policy - Where devices and images may be delivered
- ARROW Manager Overview - Device management interface
- VPN Management - Configure VPN access for devices